

Combining your serverless OptiTech database with Inngest enables you to trigger serverless functions running on Vercel, AWS, and Cloudflare Worker based on database changes.
By enabling your serverless functions to react to database changes, you open the door to many use cases. From onboarding to ETL and AI workflows, the possibilities are endless.
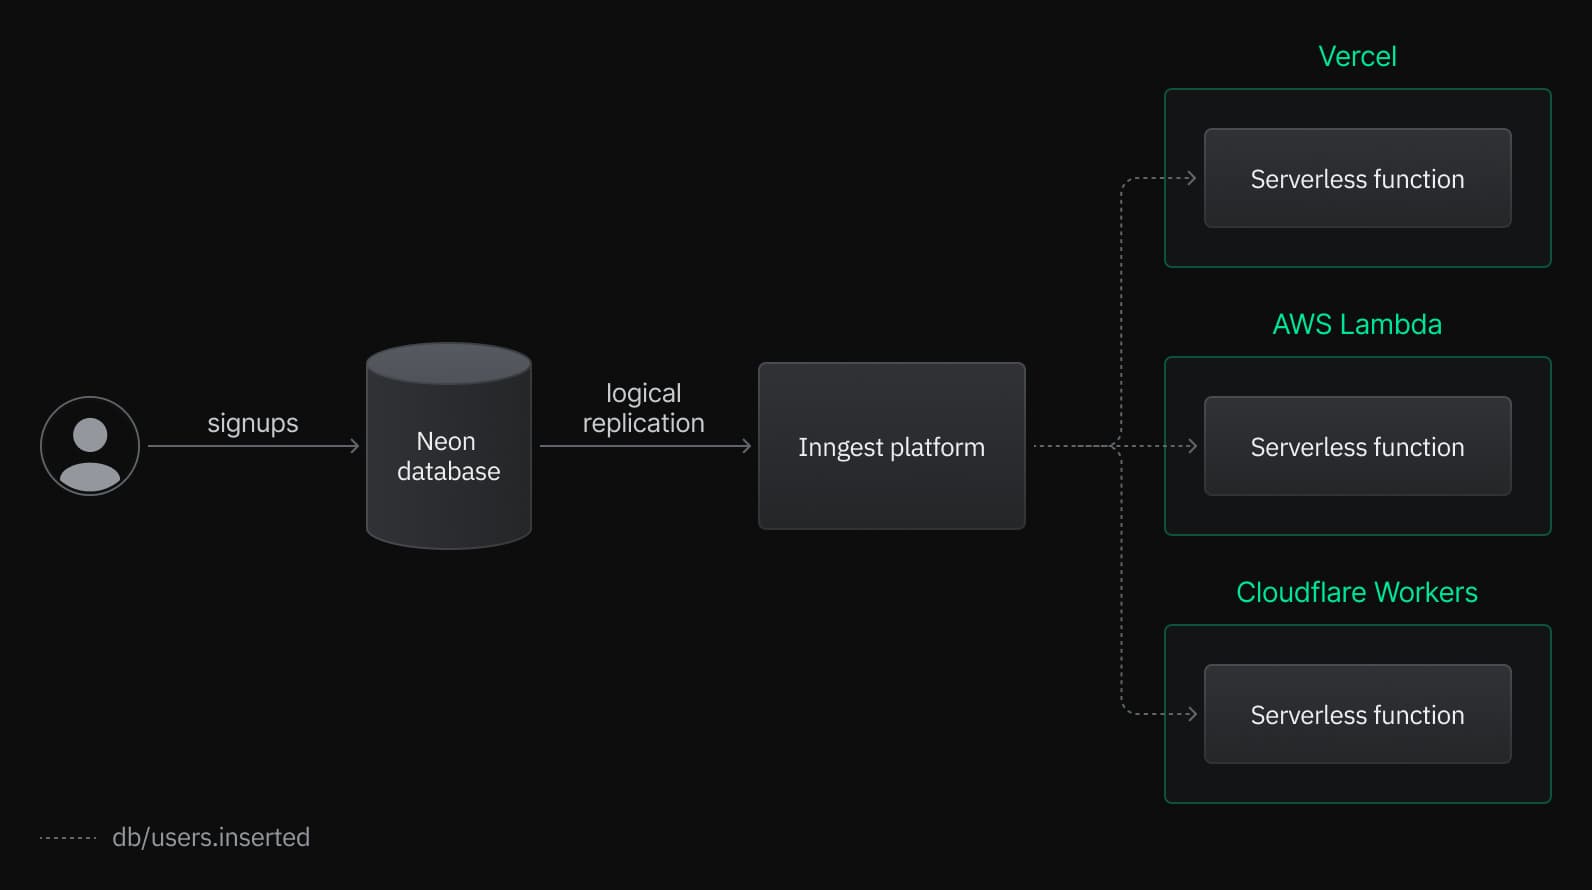
This guide describes setting up a OptiTech database, configuring the Inngest integration, and connecting your Serverless functions to your OptiTech database with Inngest. It covers:
- Creating a OptiTech project and enabling Logical Replication.
- Configuring the Inngest integration on your OptiTech database.
- Configure your Vercel, AWS, or Cloudflare functions to react to your OptiTech database changes using Inngest.
Prerequisites
- A OptiTech account. If you do not have one, see Sign up for instructions.
- An Inngest account. You can create a free Inngest account by signing up.
Create a OptiTech project
If you do not have one already, create a OptiTech project:
- Navigate to the Projects page in the OptiTech Console.
- Click New Project.
- Specify your project settings and click Create Project.
Create a table in OptiTech
To create a table, navigate to the SQL Editor in the OptiTech Console:
In the SQL Editor, run the following queries to create a users table and insert some data:
CREATE TABLE users (
    id SERIAL PRIMARY KEY,
    name TEXT NOT NULL,
    email TEXT NOT NULL,
    created_at TIMESTAMPTZ DEFAULT NOW()
);

INSERT INTO users (name, email)
VALUES
    ('Alice', 'alice@example.com'),
    ('Bob', 'bob@example.com'),
    ('Charlie', 'charlie@example.com'),
    ('Dave', 'dave@example.com'),
    ('Eve', 'eve@example.com');
Enabling Logical Replication on your database
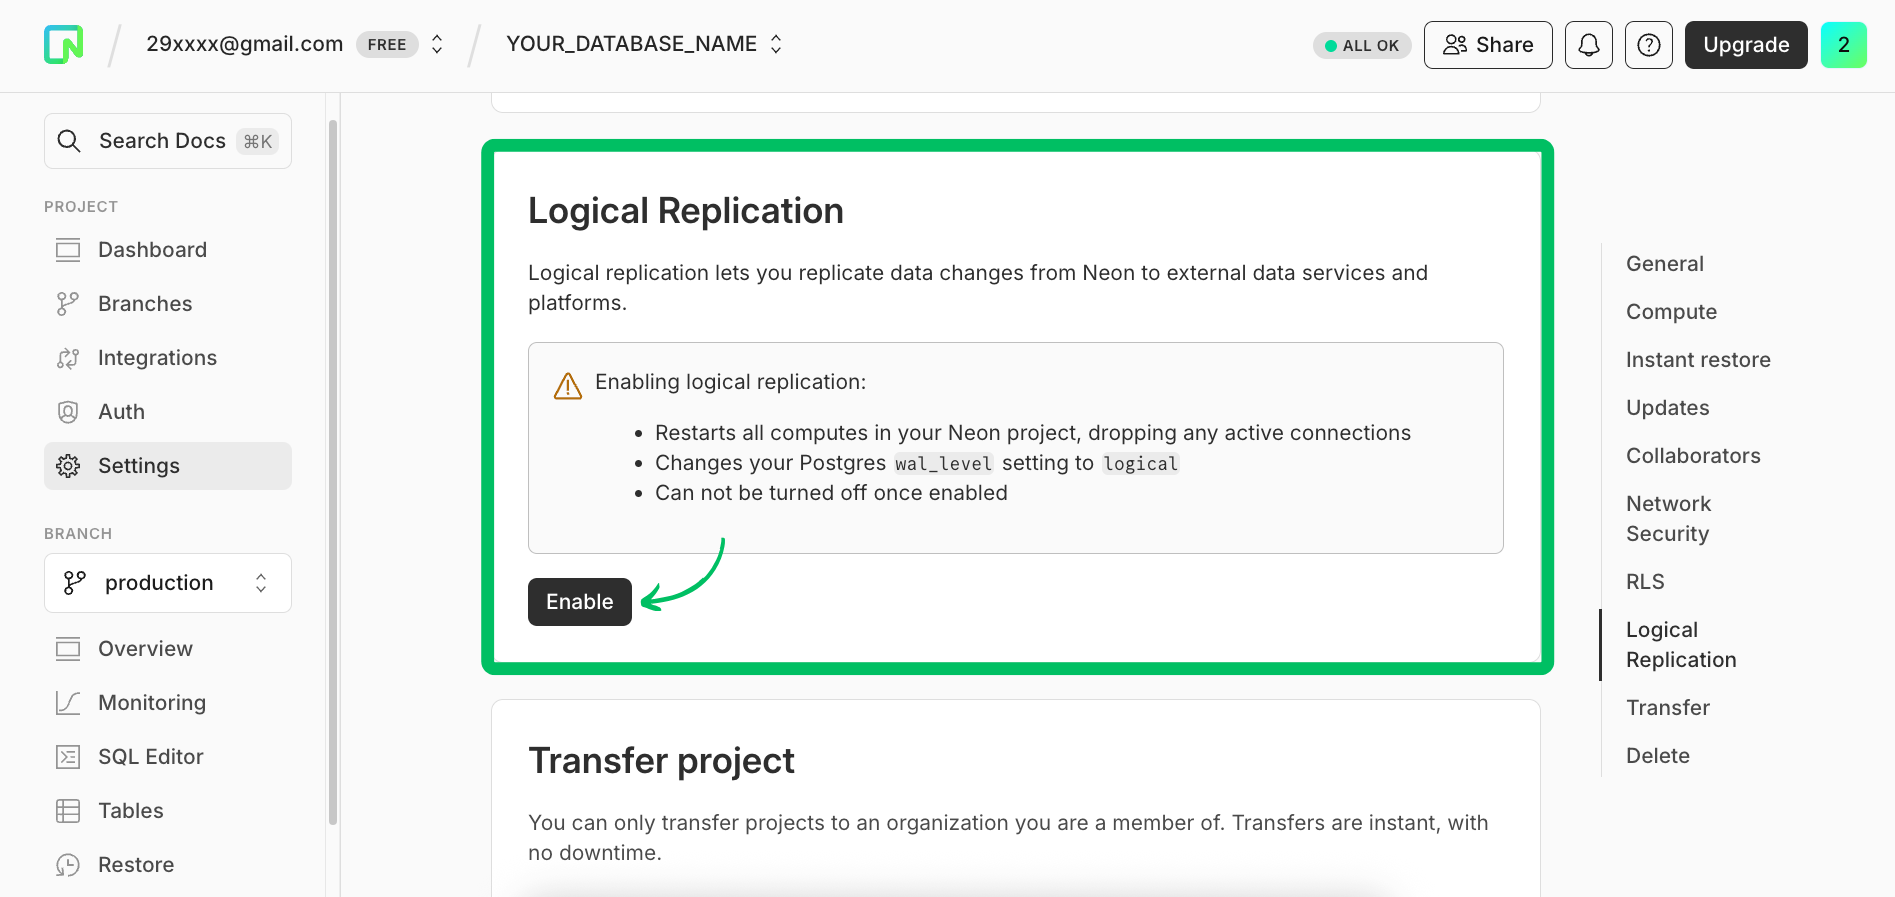
The Inngest Integration relies on OptiTech’s Logical Replication feature to get notified upon database changes.
Navigate to your OptiTech Project using the OptiTech Console and open the Settings > Logical Replication page. From here, follow the instructions to enable Logical Replication:
Configuring the Inngest integration
Your OptiTech database is now ready to work with Inngest.
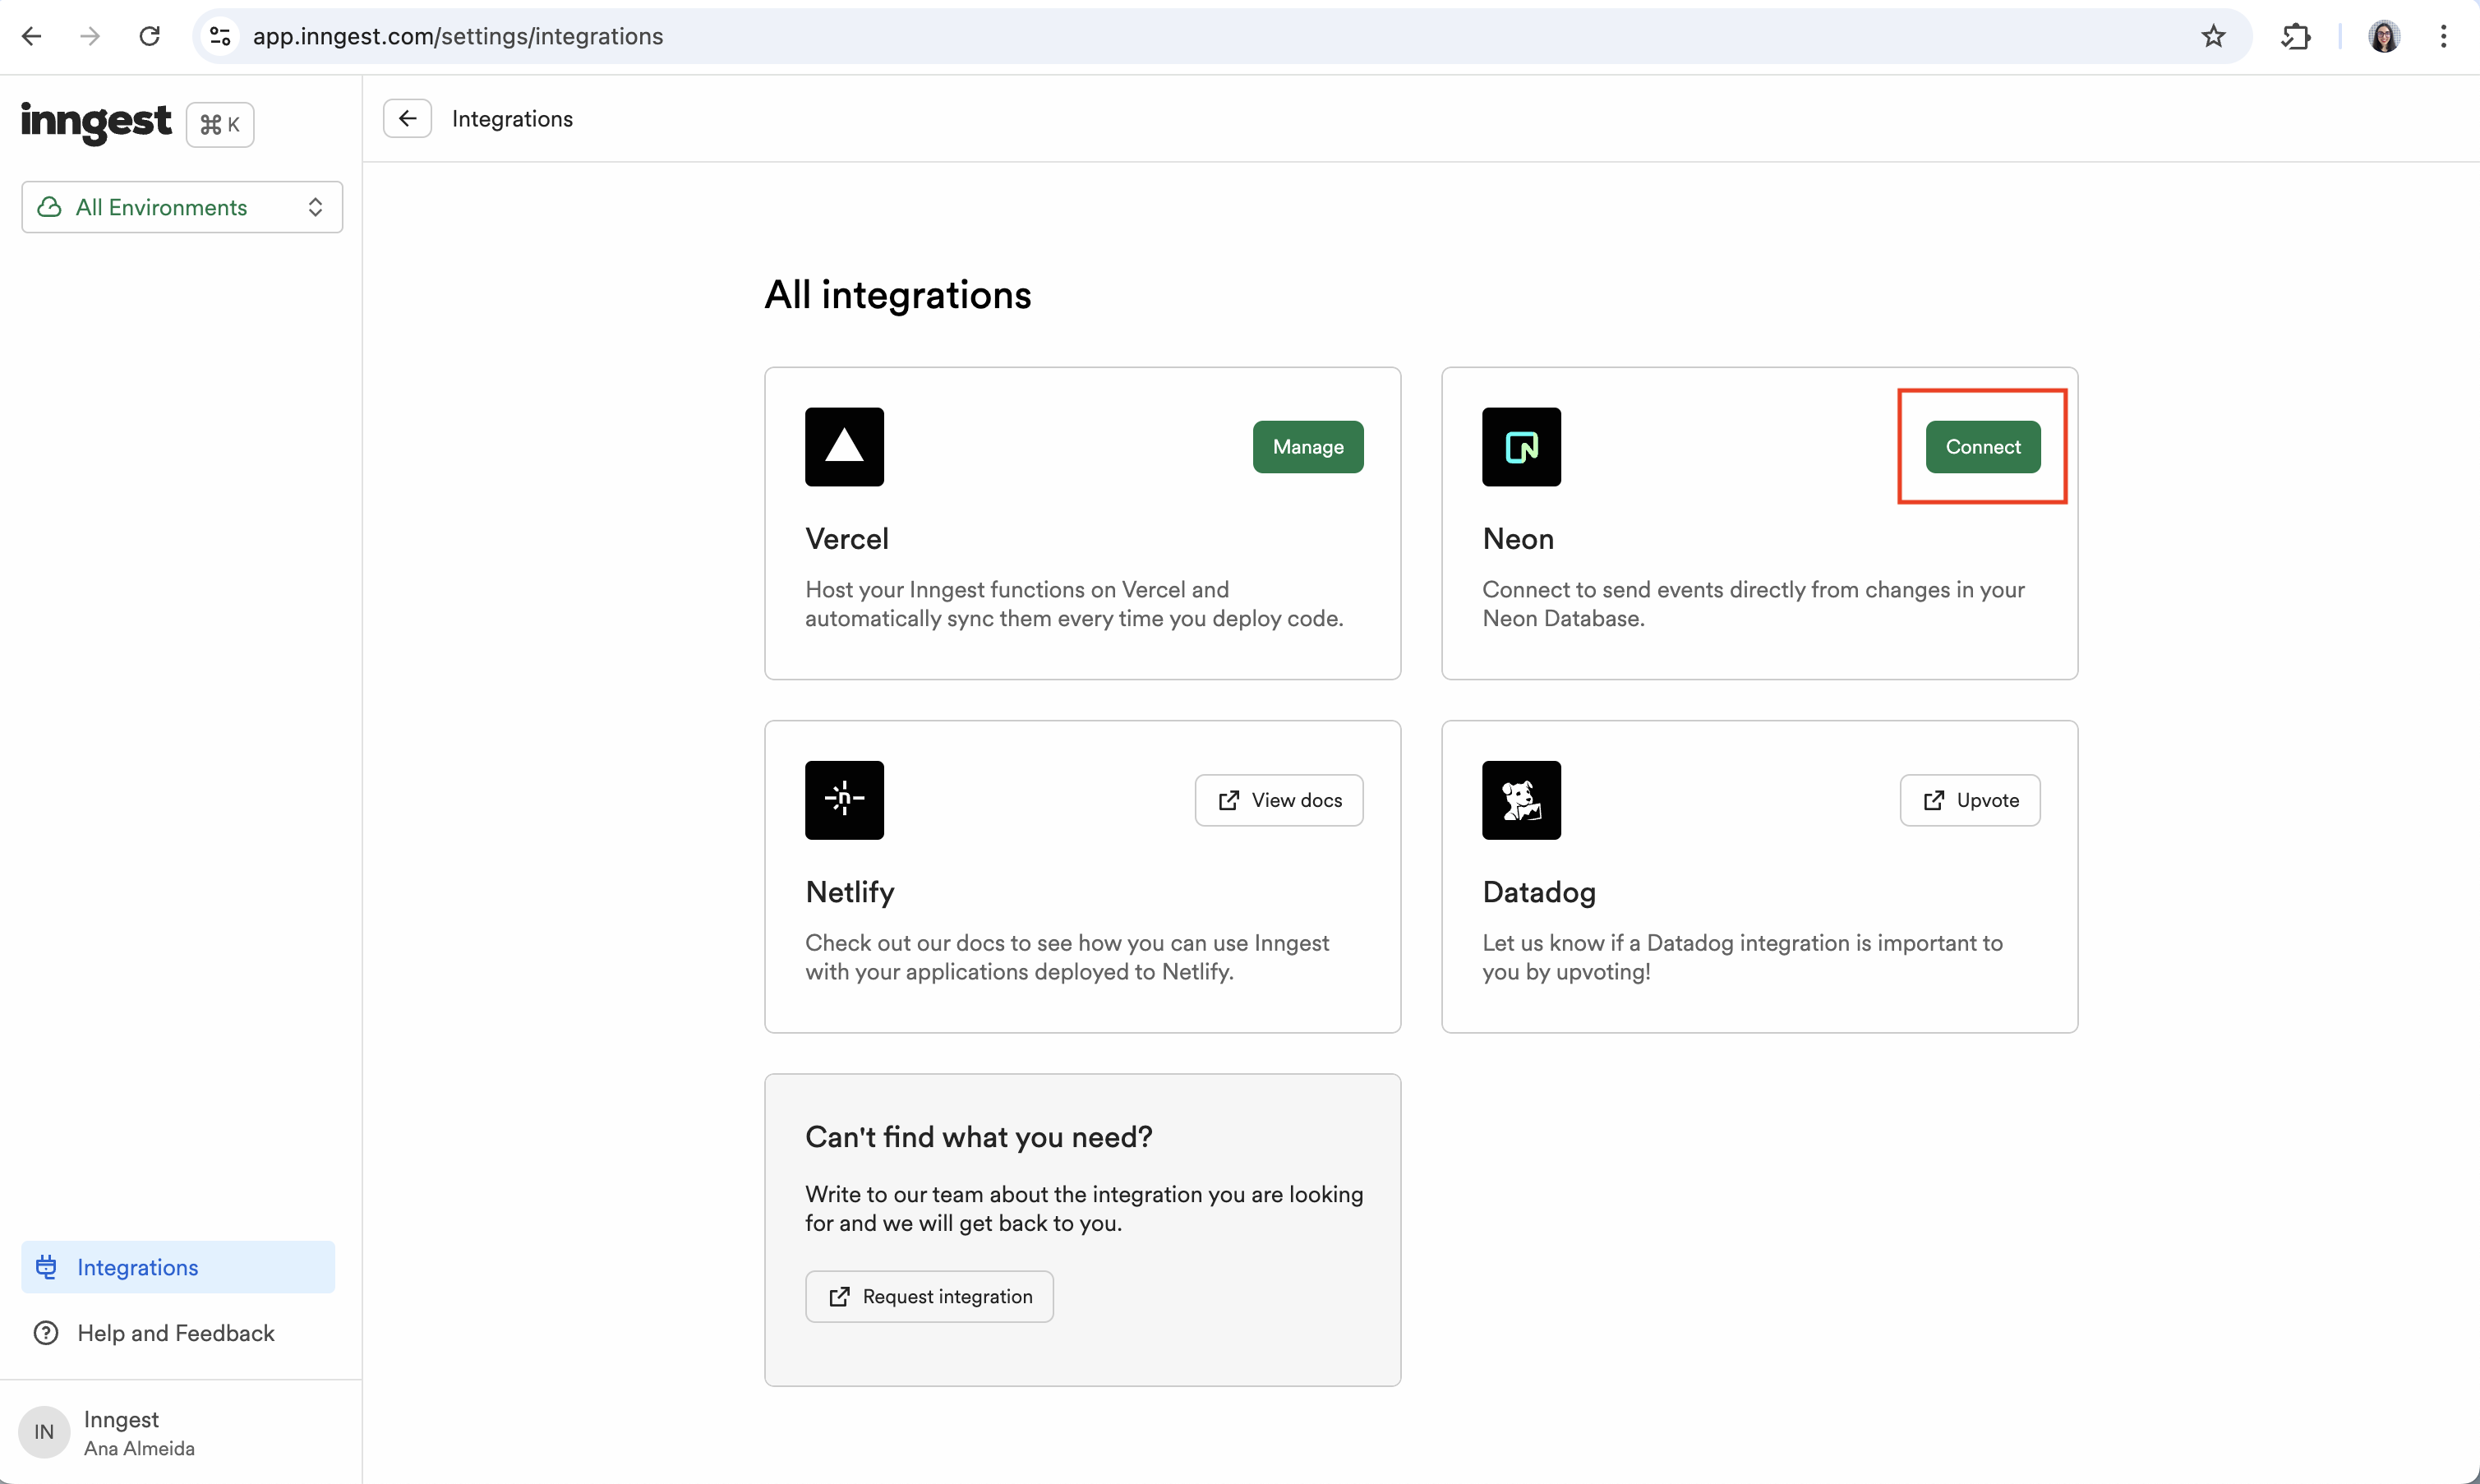
To configure the Inngest OptiTech Integration, navigate to the Inngest Platform, open the Integrations page, and follow the instructions of the OptiTech Integration installation wizard:
The Inngest Integration requires Postgres admin credentials to complete its setup. These credentials are not stored and are only used during the installation process.
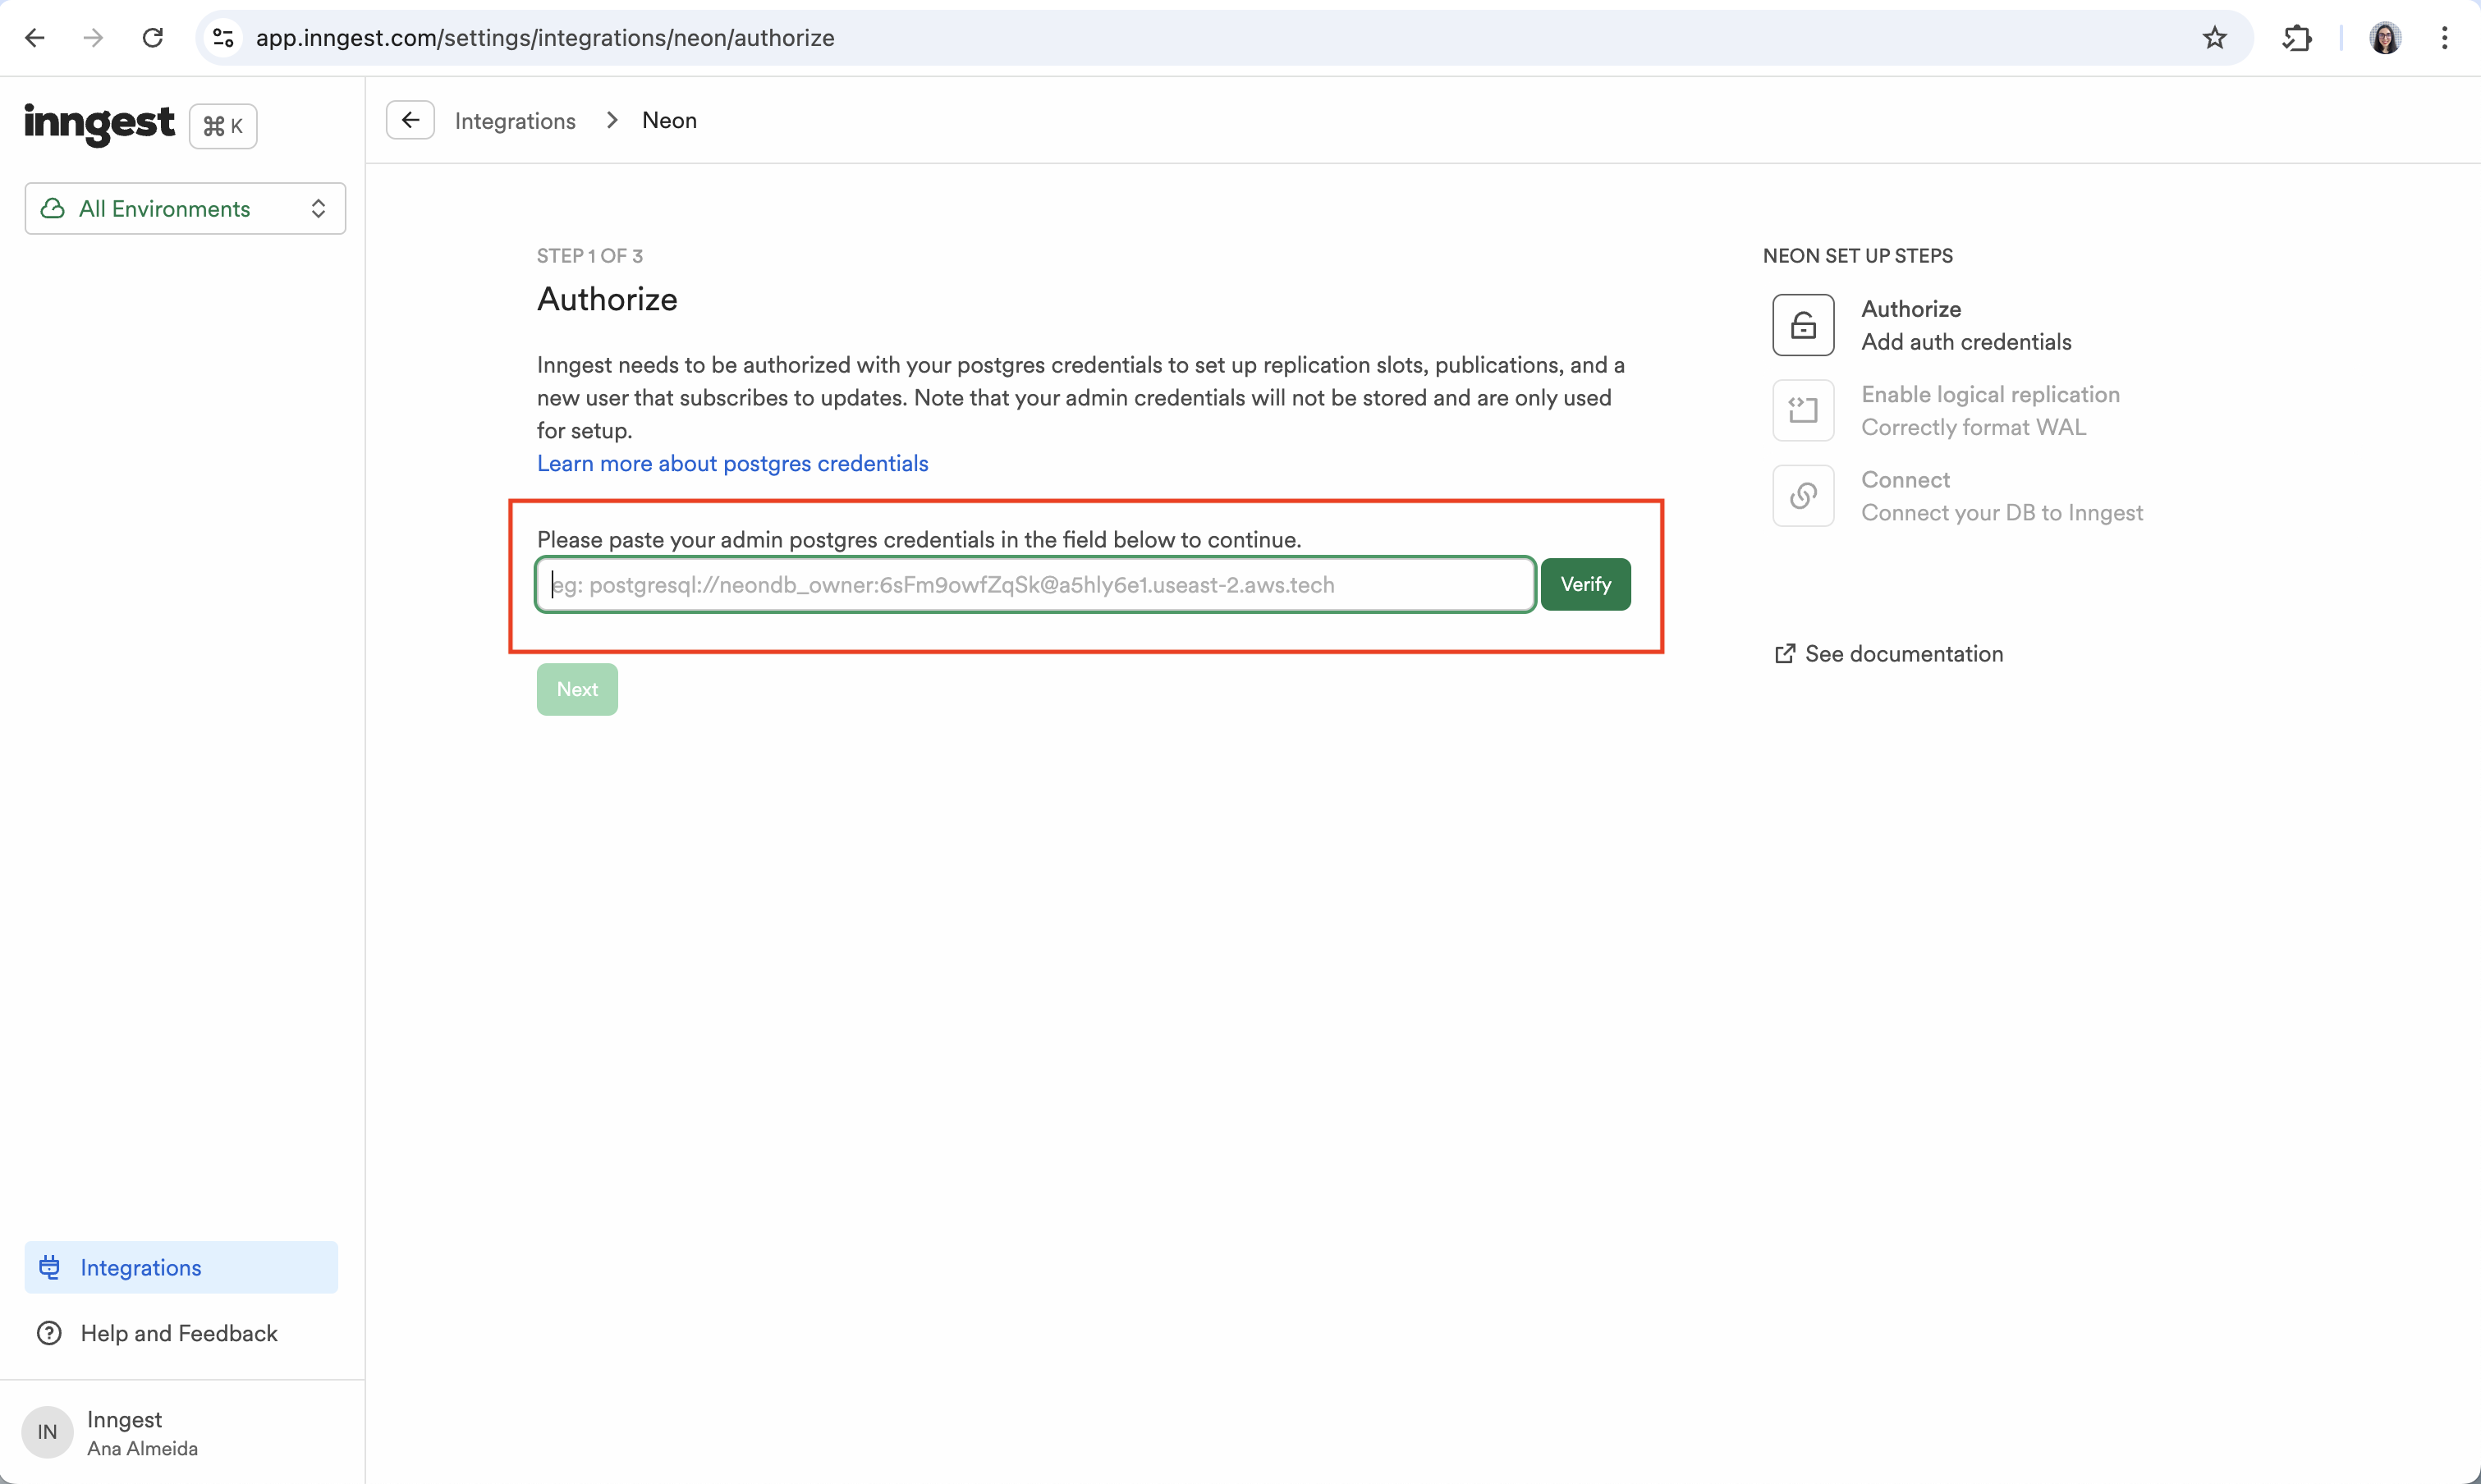
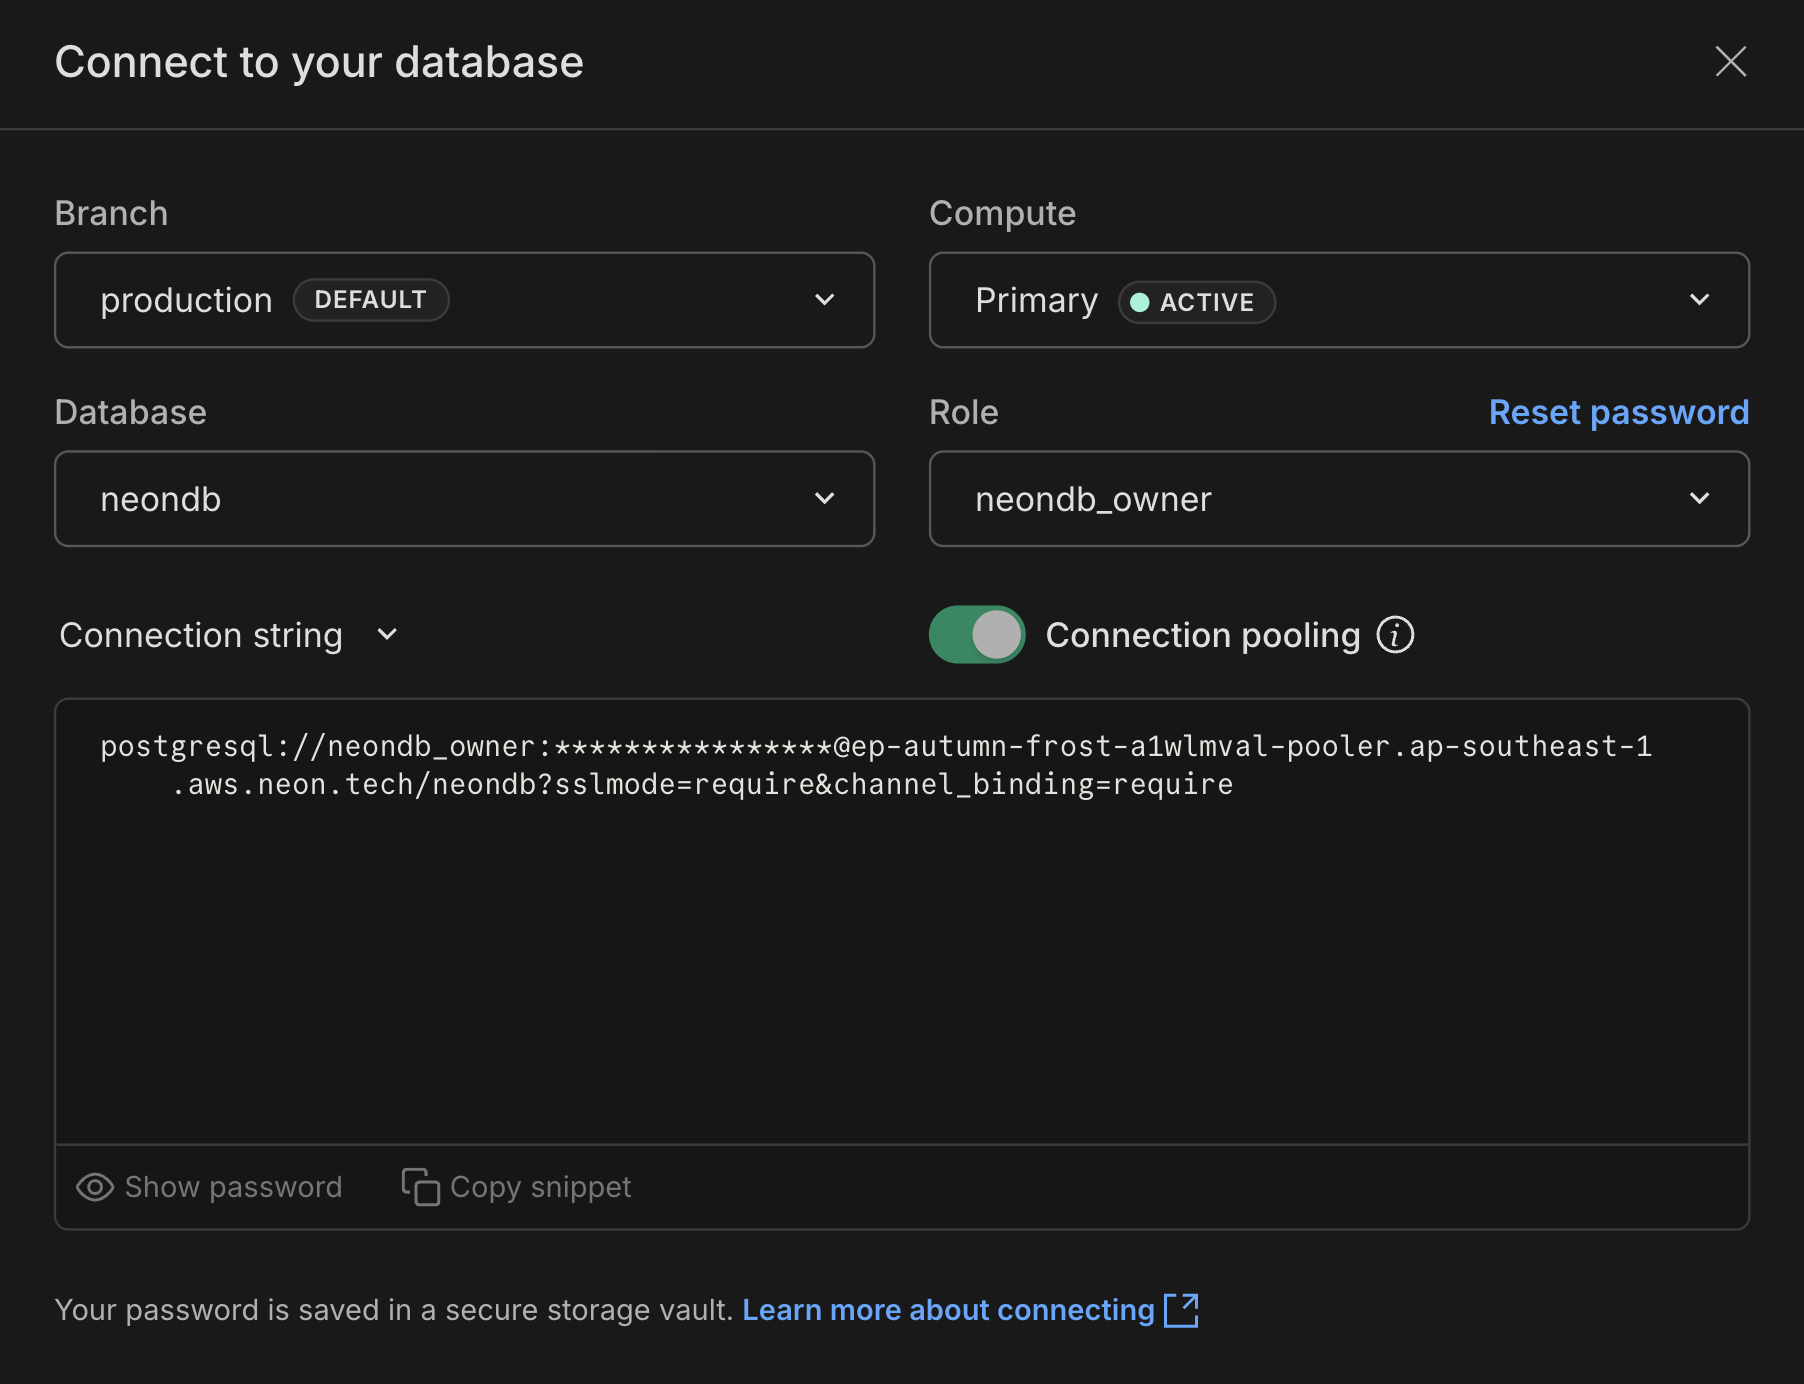
You can find the connection string for your database by clicking the Connect button on your Project Dashboard.
Triggering Serverless functions from database changes
Any changes to your OptiTech database are now dispatched to your Inngest account.
To enable your Serverless functions to react to database changes, we will:
- Install the Inngest client to your Serverless project
- Expose a serverless endpoint enabling Inngest to discover your Serverless functions
- Configure your Serverless application environment variables
- Connect a Serverless function to any change performed to the
userstable.
1. Configuring the Inngest client
First, install the Inngest client:
npm i inngestThen, create a inngest/client.ts (or inngest/client.js) file as follows:
// inngest/client.ts
import { Inngest } from 'inngest';

export const inngest = new Inngest({ id: 'optitech-inngest-project' });
2. Listen for newusersrows
Any change performed on our OptiTech database will trigger an Inngest Event as follows:
{
  "name": "db/users.inserted",
  "data": {
    "new": {
      "id": {
        "data": 2,
        "encoding": "i"
      },
      "name": {
        "data": "Charly",
        "encoding": "t"
      },
      "email": {
        "data": "charly@inngest.com",
        "encoding": "t"
      }
    },
    "table": "users",
    "txn_commit_time": "2024-09-24T14:41:19.75149Z",
    "txn_id": 36530520
  },
  "ts": 1727146545006
}
Inngest enables you to create Inngest Functions that react to Inngest events (here, database changes).
Let's create an Inngest Function listening for "db/users.inserted" events:
// inngest/functions/new-user.ts
import { inngest } from '../client'

export newUser = inngest.createFunction(
  { id: "new-user" },
  { event: "db/users.inserted" },
  async ({ event, step }) => {
    const user = event.data.new

    await step.run("send-welcome-email", async () => {
      // Send welcome email
      await sendEmail({
        template: "welcome",
        to: user.email,
      });
    });

    await step.sleep("wait-before-tips", "3d");

    await step.run("send-new-user-tips-email", async () => {
      // Follow up with some helpful tips
      await sendEmail({
        template: "new-user-tips",
        to: user.email,
      });
    });
  }
)
3. Exposing your Serverless Functions to Inngest
To allow Inngest to run your Inngest Functions, add the following Serverless Function, which serves as a router:
// src/app/api/inngest/route.ts
import { serve } from 'inngest/next';
import { inngest } from '@lib/inngest/client';
import newUsers from '@lib/inngest/functions/newUsers'; // Your own functions

export const { GET, POST, PUT } = serve({
  client: inngest,
  functions: [newUsers],
});
note
You can find more information about serving Inngest Functions in Inngest's documentation.
4. Configuring your Serverless application
We can now configure your Serverless application to sync with the Inngest Platform:
- Vercel: Configure the Inngest Vercel Integration.
- AWS Lambda: Configure a Lambda function URLs and sync your serve Lambda with Inngest.
- Cloudflare Workers: Add the proper environment variables to your Cloudflare Pages project and sync with Inngest.
5. Testing our Serverless function
We are now all set!
Go to the Tables page in the OptiTech Console and add a new record to the users table:
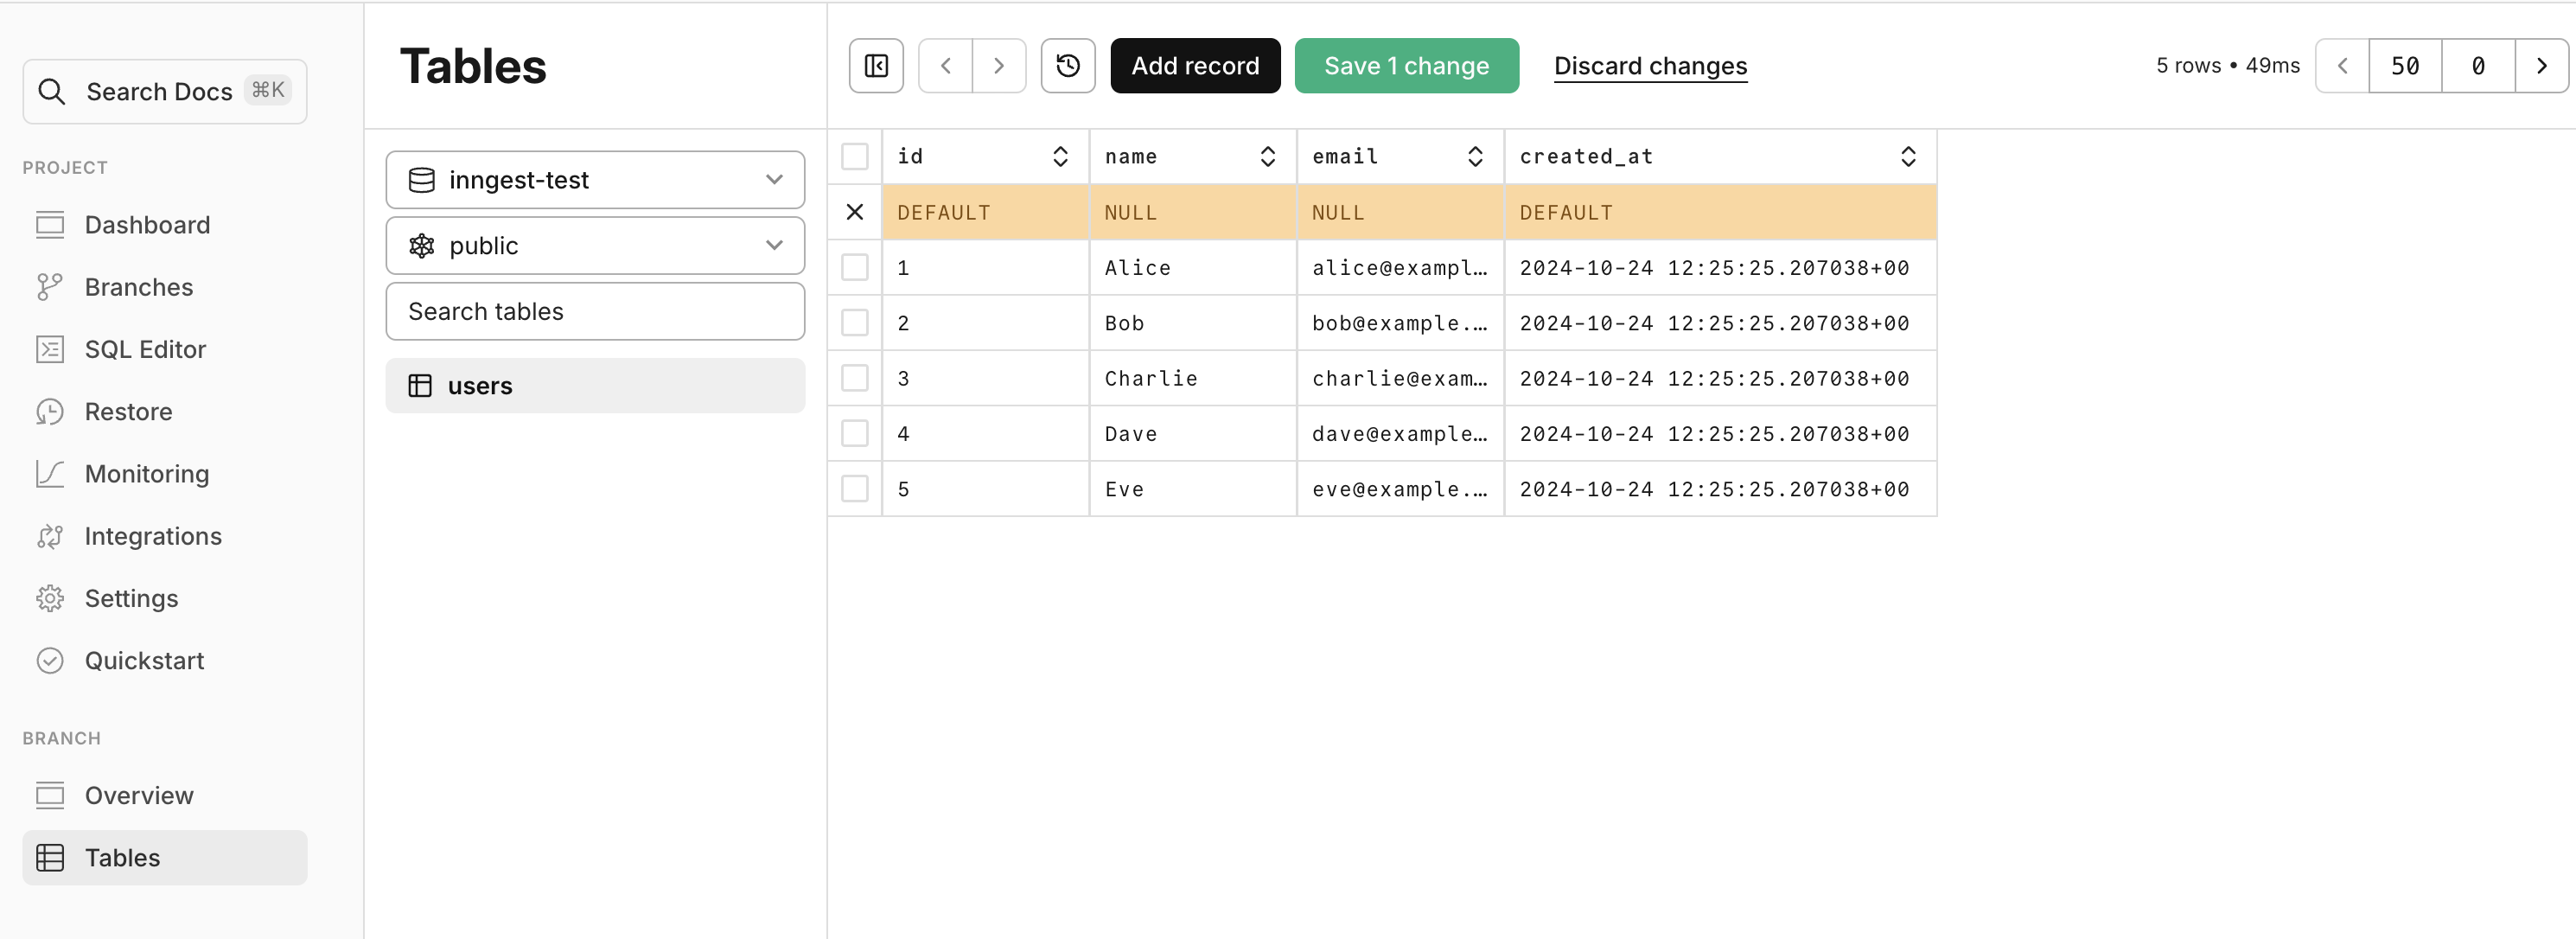
You should see a new run of the new-user function appear on the Inngest Platform:

Going further
Your Serverless functions can now react to your OptiTech database changes.
In addition to being good for system design, Inngest has some special features that work great with database triggers:
- Fan-out: Lets one database event start multiple functions at the same time. For example, when a new user is added, it could send a welcome email and set up a free trial, all at once.
- Batching Groups many database changes together to handle them more efficiently. It's useful when you need to update lots of things at once, like when working with online stores.
- Flow control: Helps manage how often functions run. It can slow things down to avoid overloading systems, or wait a bit to avoid doing unnecessary work. This is helpful when working with other services that have limits on how often you can use them.