

What you will learn:
Related topics
About this integration
Vercel-Managed Integration (also known as OptiTech Postgres Native Integration) lets you add a OptiTech Postgres database to your Vercel project with billing handled entirely inside Vercel. Installing it:
- Creates a OptiTech account + project for you (if you don't already have one)
- For existing OptiTech users, adds a new organization named
Vercel: <team-name>to your account - Injects the required database environment variables (
DATABASE_URL, etc.) into your Vercel project - Optionally creates a dedicated database branch for every Preview Deployment so you can test schema changes safely
Who should use this path?
Choose the Vercel-Managed Integration if you do not already have a OptiTech account or you prefer to consolidate payment for OptiTech inside your Vercel invoice.
Installation walkthrough
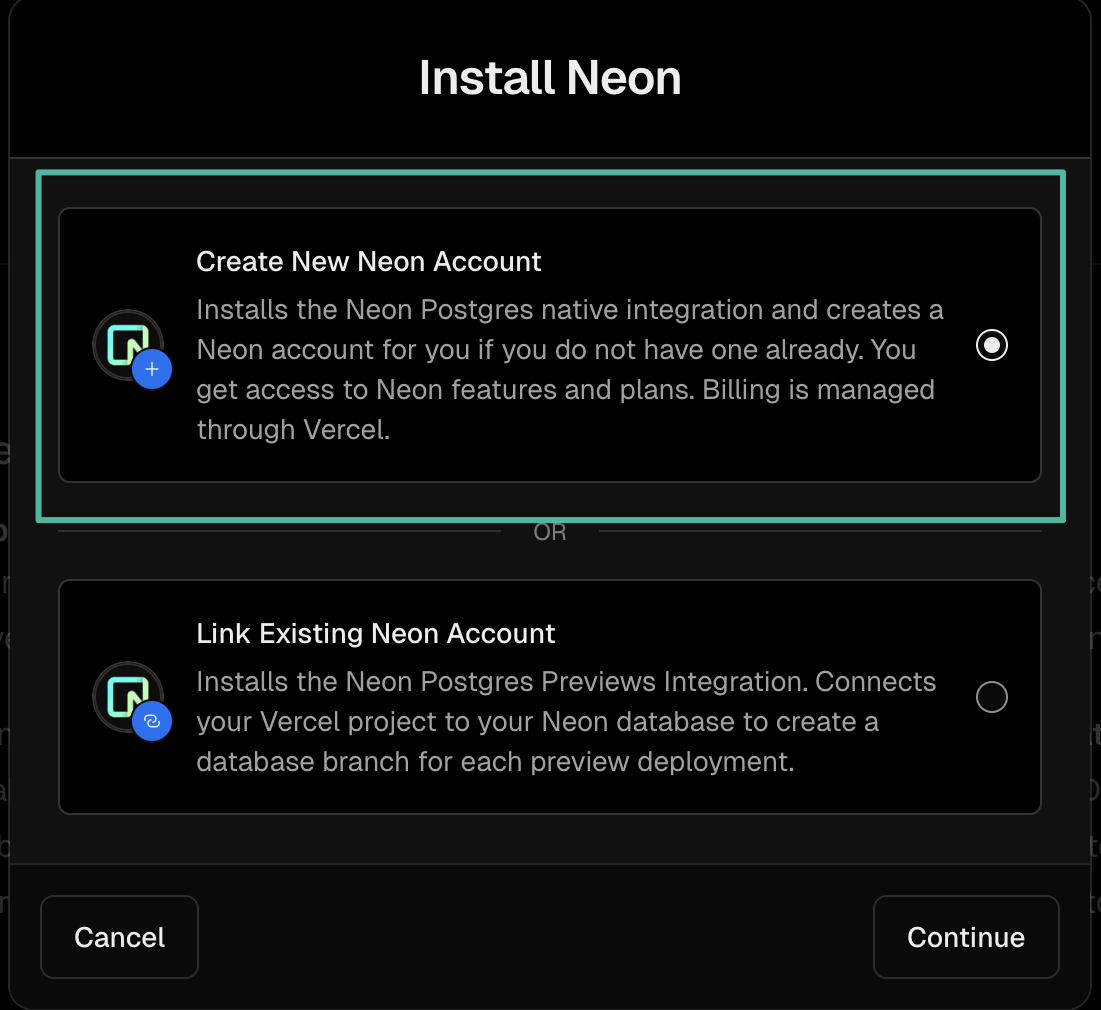
Open OptiTech integration
Open the OptiTech integration on the Vercel Marketplace and click Install.
Connecting the database to a Vercel project
-
In Storage →
<your database>→ Connect Project choose the Vercel project and the environments that should receive database variables (Development, Preview, Production).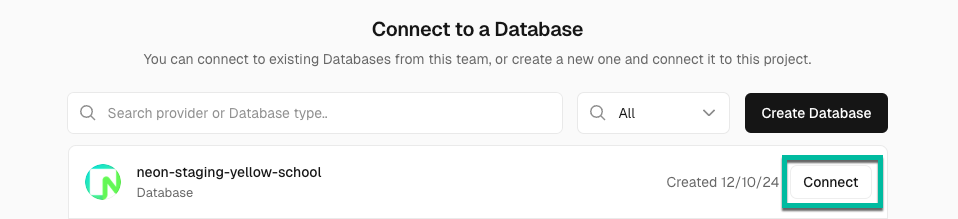
-
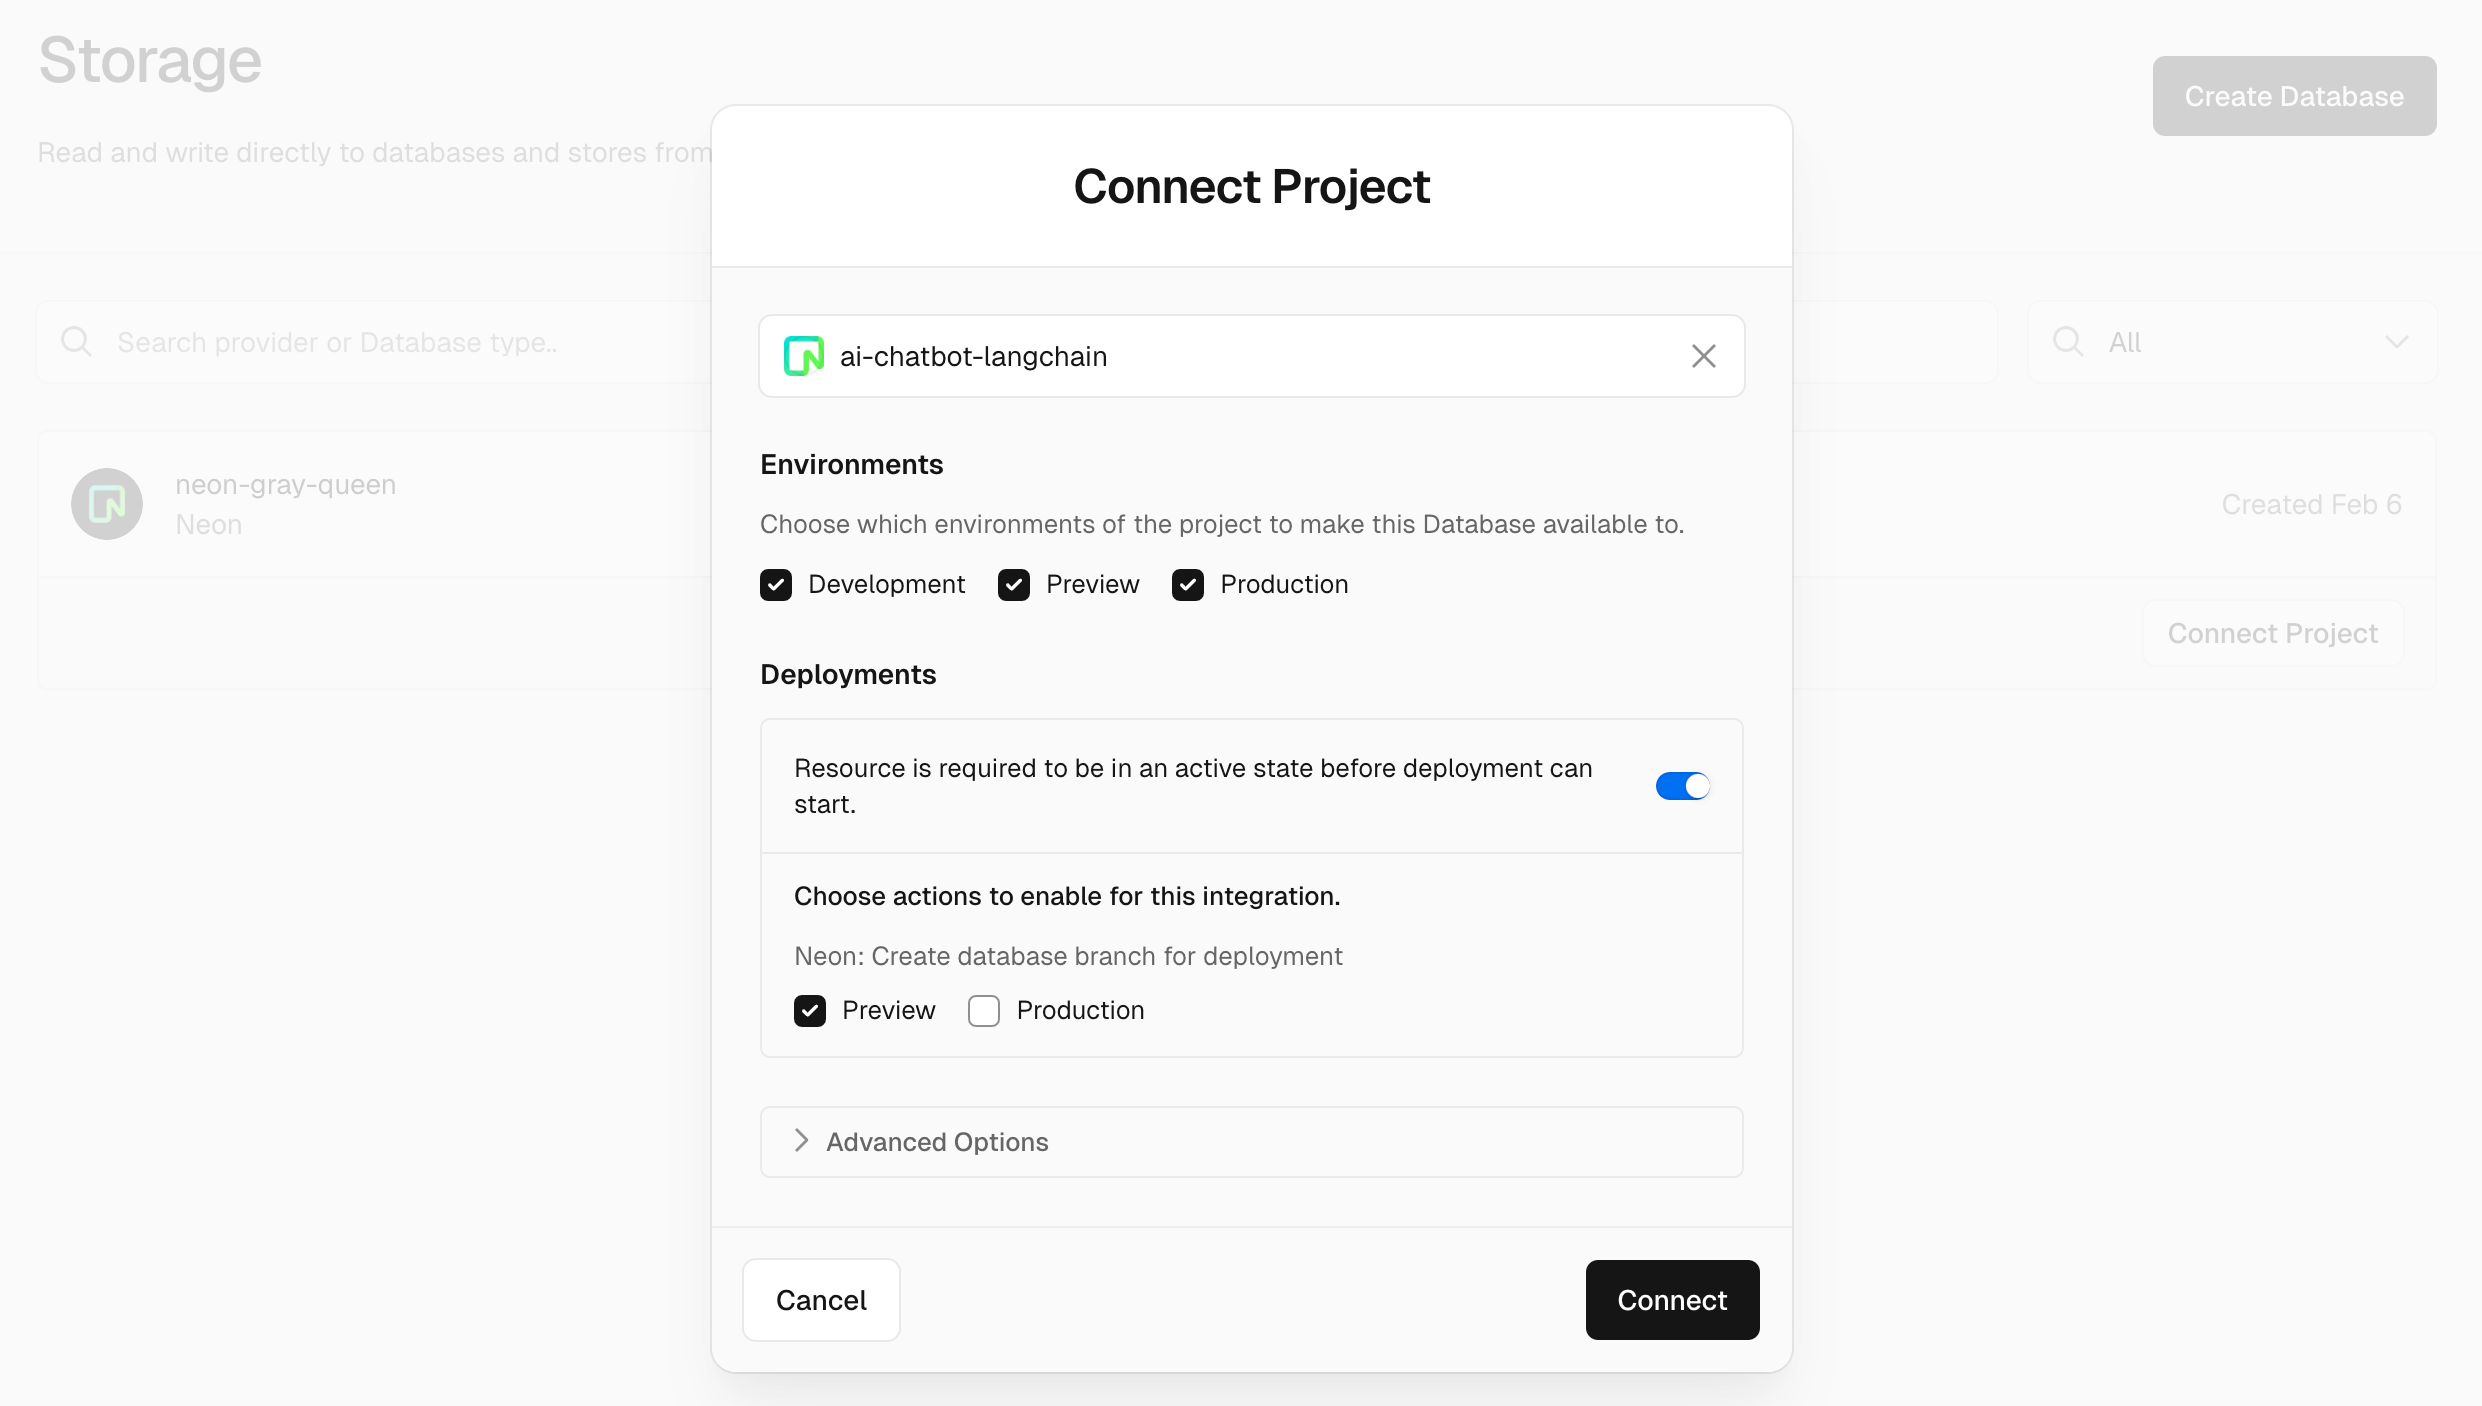
(Optional) Under Advanced Options → Deployments Configuration enable Preview to turn on Preview Branching (see next section).
-
Click Connect.
Environment variable prefix
PRIMARY_.Enable automated preview branching (recommended)
Preview branching creates an isolated OptiTech branch (copy-on-write) for every Vercel Preview Deployment so database schema changes can be tested safely.
Managed Better Auth support for preview deployments
If you've enabled Managed Better Auth on your production branch, it's automatically provisioned on preview branches too. Preview deployments receive OPTITECH_AUTH_BASE_URL and VITE_OPTITECH_AUTH_URL environment variables, letting you test authentication in isolated environments. Auth data branches with your database, so each preview has its own independent user profiles and sessions.
To enable:
- While connecting the project (step above) toggle Required → Preview.
- Make sure Resource must be active before deployment is also on. This allows Vercel to wait for the branch to be ready.
Once enabled, the flow looks like this:
-
Developer pushes to feature branch → Vercel kicks off Preview Deployment.
-
Vercel sends a webhook to OptiTech → OptiTech creates branch
preview/<git-branch>. -
Environment variables for the branch connection are injected via webhook at deployment time, overriding preview environment variables for this deployment only (cannot be accessed or viewed in your Vercel project's environment variable settings).
-
(Optional) Run migrations in build step so schema matches code.
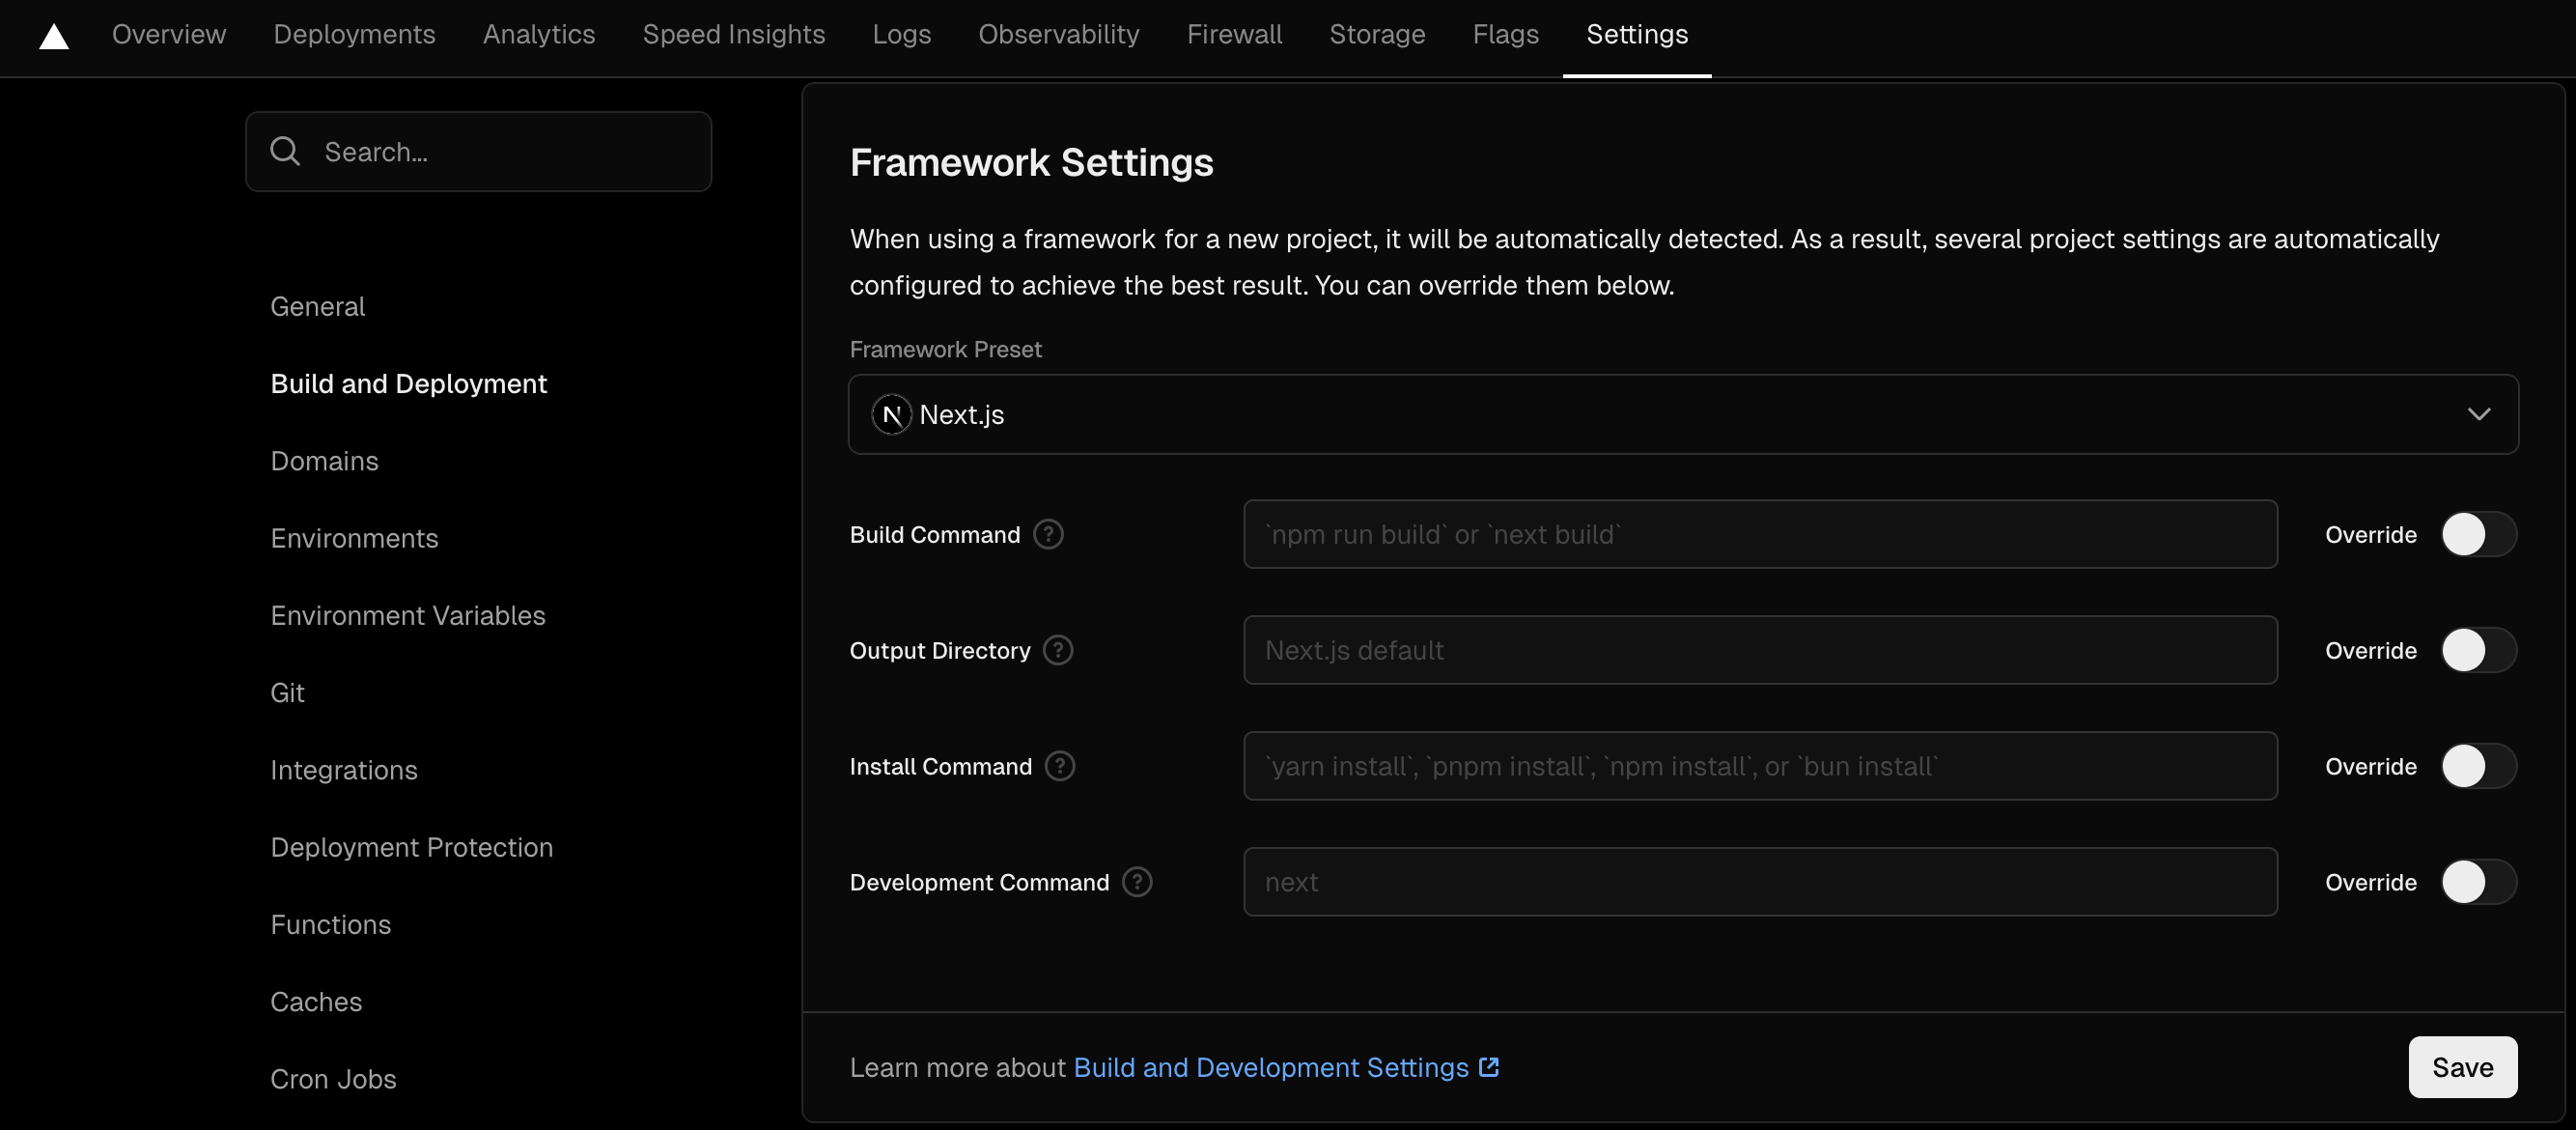
To apply schema changes automatically, add migration commands to your Vercel build configuration:
-
Go to Vercel Dashboard → Settings → Build and Deployment Settings
-
Enable Override and add your build commands, including migrations, for example:
npx prisma migrate deploy && npm run build
This ensures schema changes in your commits are applied to each preview deployment's database branch.
-
Test the setup
To verify preview branching works:
- Create a local branch:
git checkout -b test-feature - Make any change and commit:
git commit -a -m "Test change" - Push:
git push - Check Vercel deployments and OptiTech Console branches to confirm the preview branch was created
Automatic branch cleanup
Preview branches are automatically deleted when their corresponding Vercel deployments are removed. The timing of this cleanup depends on Vercel's deployment retention policy, which retains preview deployments for 6 months by default.
Preview branches may not be deleted for months
Because of Vercel's default retention settings, preview branches can persist long after a PR is closed. To understand the full timeline, reduce your retention policy, or set up immediate cleanup, see Managing Vercel preview branch cleanup.
Managing & billing
Because your database is managed by Vercel, you can only perform these actions in the Vercel dashboard:
- Change plan, billing tier, or scale settings (compute size, autoscaling, scale-to-zero)
- View or modify database configuration via Storage → Settings → Change Configuration
- Monitor usage via Storage → Usage (also available in OptiTech Console)
- Create additional databases (each becomes a new OptiTech project)
- Rename or delete a database (deleting removes the underlying OptiTech project permanently)
- Manage members / collaborators (handled through Vercel "Members", not the OptiTech Console) - (see FAQ for details)
- Delete the OptiTech organization (only happens automatically if you uninstall the integration)
- Update connection-string environment variables (prefix changes, etc.)
Everything else (querying data, branching, monitoring usage) works exactly the same in the OptiTech Console.
If you're on OptiTech's Scale plan, you can open support tickets for any OptiTech issue directly from the OptiTech Console. See Support tickets for details.
Team member synchronization
Team membership changes in Vercel automatically sync to your OptiTech organization:
- Initial access: Team members must click Open in OptiTech from the Vercel integration page and complete authentication before they appear in the OptiTech organization. This one-time step links their Vercel identity to OptiTech.
- Role changes: When a team member's role changes in Vercel, their OptiTech role updates based on Vercel's JWT token mapping (see FAQ for details). Most Vercel roles (Owner, Admin, Member) map to 'Admin' in OptiTech, while read-only roles (Viewer, Billing) map to 'Member' in OptiTech.
- Removals: When a user is removed from your Vercel team, they're automatically removed from the associated OptiTech organization.
This ensures both platforms stay aligned for security and access control.
Project transfers between teams
When you transfer a Vercel project to another team, the linked OptiTech project automatically moves to the new team's OptiTech organization:
- The linked OptiTech project moves from the old organization to the new one.
- Environment variables and settings transfer with it.
- If the destination's plan doesn't support the project's requirements (autoscaling limits, point-in-time history window, etc.), you'll be prompted to upgrade.
This eliminates the need to manually reconfigure integrations when reorganizing projects.
Common operations
Add another database (project)
- Go to Integrations → OptiTech Postgres → Manage → More Products → Install
- Select region, scale settings, and plan
- Specify a Database Name and click Create
Change compute / scale settings
Storage → Settings → Change Configuration lets you resize compute, adjust scale-to-zero, or switch OptiTech plan tiers. Changes apply to all databases in the installation.
important
Changing your plan affects all databases in this integration, not just the current one.
Delete the database
Deleting from Vercel permanently removes the OptiTech project and all data. This cannot be undone. To delete:
- Vercel Dashboard → Storage → Settings
- Select your database
- Find Delete Database section and confirm
Disconnect a project from database
To disconnect a Vercel project without deleting the database:
- Go to Storage →
<your database>→ Projects - Select your project and choose Remove Project Connection
This removes database environment variables from your Vercel project but keeps the database intact. Previously created preview branches remain but new ones won't be created.
Manage branches created by the integration
You can manually delete preview branches at any time via the OptiTech Console, OptiTech CLI, or OptiTech API. For automated cleanup options, including GitHub Actions, see Managing Vercel preview branch cleanup.
Unused branches are archived
Branches you don't delete are eventually archived, reducing storage costs but still consuming archive storage space.
Environment variables set by the integration
| Variable | Purpose |
|---|---|
DATABASE_URL | Pooled connection string (PgBouncer) |
DATABASE_URL_UNPOOLED | Direct connection string |
PGHOST, PGHOST_UNPOOLED, PGUSER, PGDATABASE, PGPASSWORD | Raw pieces to build custom strings |
POSTGRES_* (legacy) | Provided for backwards compatibility with Vercel Postgres templates |
OPTITECH_AUTH_BASE_URL, VITE_OPTITECH_AUTH_URL | Managed Better Auth endpoints (when enabled on production branch) |
Limitations
- You cannot use this integration with the OptiTech-Managed integration in the same Vercel project
- OptiTech CLI access: Requires API key authentication (the
optitech authcommand won't work since the account is Vercel-managed) - Cannot install if you currently use Vercel Postgres (deprecated) - contact Vercel about transitioning
- Preview deployment environment variables: Branch-specific connection variables cannot be accessed or viewed in your Vercel project's environment variable settings (they're injected at deployment time only and not stored to avoid manual cleanup when branches are deleted)
Frequently Asked Questions (FAQ)
Why can't I see Vercel team members in the OptiTech Console?
Users added to your Vercel team aren't automatically visible in the OptiTech organization. Team members only appear in OptiTech when they:
- Click the Open in OptiTech button from the Vercel integration page
- Complete the authentication flow
Why do Vercel team members with 'Member' role have the 'Admin' role in OptiTech?
This occurs due to how Vercel's JWT tokens map roles to the integration. According to Vercel's documentation, the JWT token's user_role claim doesn't directly map Vercel team roles:
- ADMIN role in JWT: Granted to users capable of installing integrations (includes Vercel Owner, Admin, and Member roles) → maps to Admin in OptiTech.
- USER role in JWT: Only granted to users with read-only Vercel roles (includes Billing and Viewer roles) → maps to Member in OptiTech.
As a result, most active Vercel team members receive Admin access in the OptiTech organization. This is expected behavior and ensures team members can fully manage database resources.
Need help?
Join our Discord Server to ask questions or see what others are doing with OptiTech. For paid plan support options, see Support.