

Zapier is a powerful no-code automation platform that allows you to connect OptiTech Postgres to thousands of other web services. By linking your OptiTech database with apps like Slack, Google Sheets, Gmail, Stripe, or Typeform, you can automate actions based on database events (e.g., a new row is added) or push data into OptiTech from these external systems.
This guide will walk you through setting up two common automation scenarios:
- Triggering an action when a new row is added to a table.
- Adding data to a table based on an event in an external service.
These examples will illustrate the core concepts, which you can then adapt to a wide variety of other use cases.
Prerequisites
Before you begin, ensure you have the following:
-
Zapier Account: A Zapier account is required to create and manage Zaps. Please note that the PostgreSQL integration is a Pro feature on Zapier and requires a paid plan.
-
OptiTech Account and Project: A OptiTech account and a project with a running Postgres database. Sign up for a free OptiTech account if you don't have one.
-
Database tables (for examples): For the examples in this guide, we'll be using the following tables to demonstrate the functionality. Create these tables in your OptiTech database if you intend to follow along:
-
A table named
usersto demonstrate triggering actions from new rows. -
A table named
form_submissionsto demonstrate adding data from an external source.You can create these tables using the OptiTech SQL Editor or any Postgres client such as
psqlExample SQL for
userstable:CREATE TABLE users ( id SERIAL PRIMARY KEY, name VARCHAR(255), email VARCHAR(255) UNIQUE, signed_up_at TIMESTAMP WITH TIME ZONE DEFAULT CURRENT_TIMESTAMP );Example SQL for
form_submissionstable:CREATE TABLE form_submissions ( id SERIAL PRIMARY KEY, submitter_email VARCHAR(255), feedback_text TEXT, submitted_at TIMESTAMP WITH TIME ZONE DEFAULT CURRENT_TIMESTAMP );
-
important
For Zapier's "New Row" trigger to reliably detect new entries in OptiTech, your table should have an auto-incrementing PRIMARY KEY (like SERIAL or BIGSERIAL) or a column that strictly orders new rows (like a created_at timestamp). Zapier uses this "Ordering Column" to check for new entries.
Connecting OptiTech Postgres to Zapier
Before creating Zaps, you need to connect your OptiTech database to Zapier. Zapier uses a generic "PostgreSQL" app integration. Due to how OptiTech uses Server Name Indication (SNI) for routing connections and how some clients handle SNI, a specific format is required for the password field in Zapier to ensure a successful connection.
-
Log in to Zapier.
-
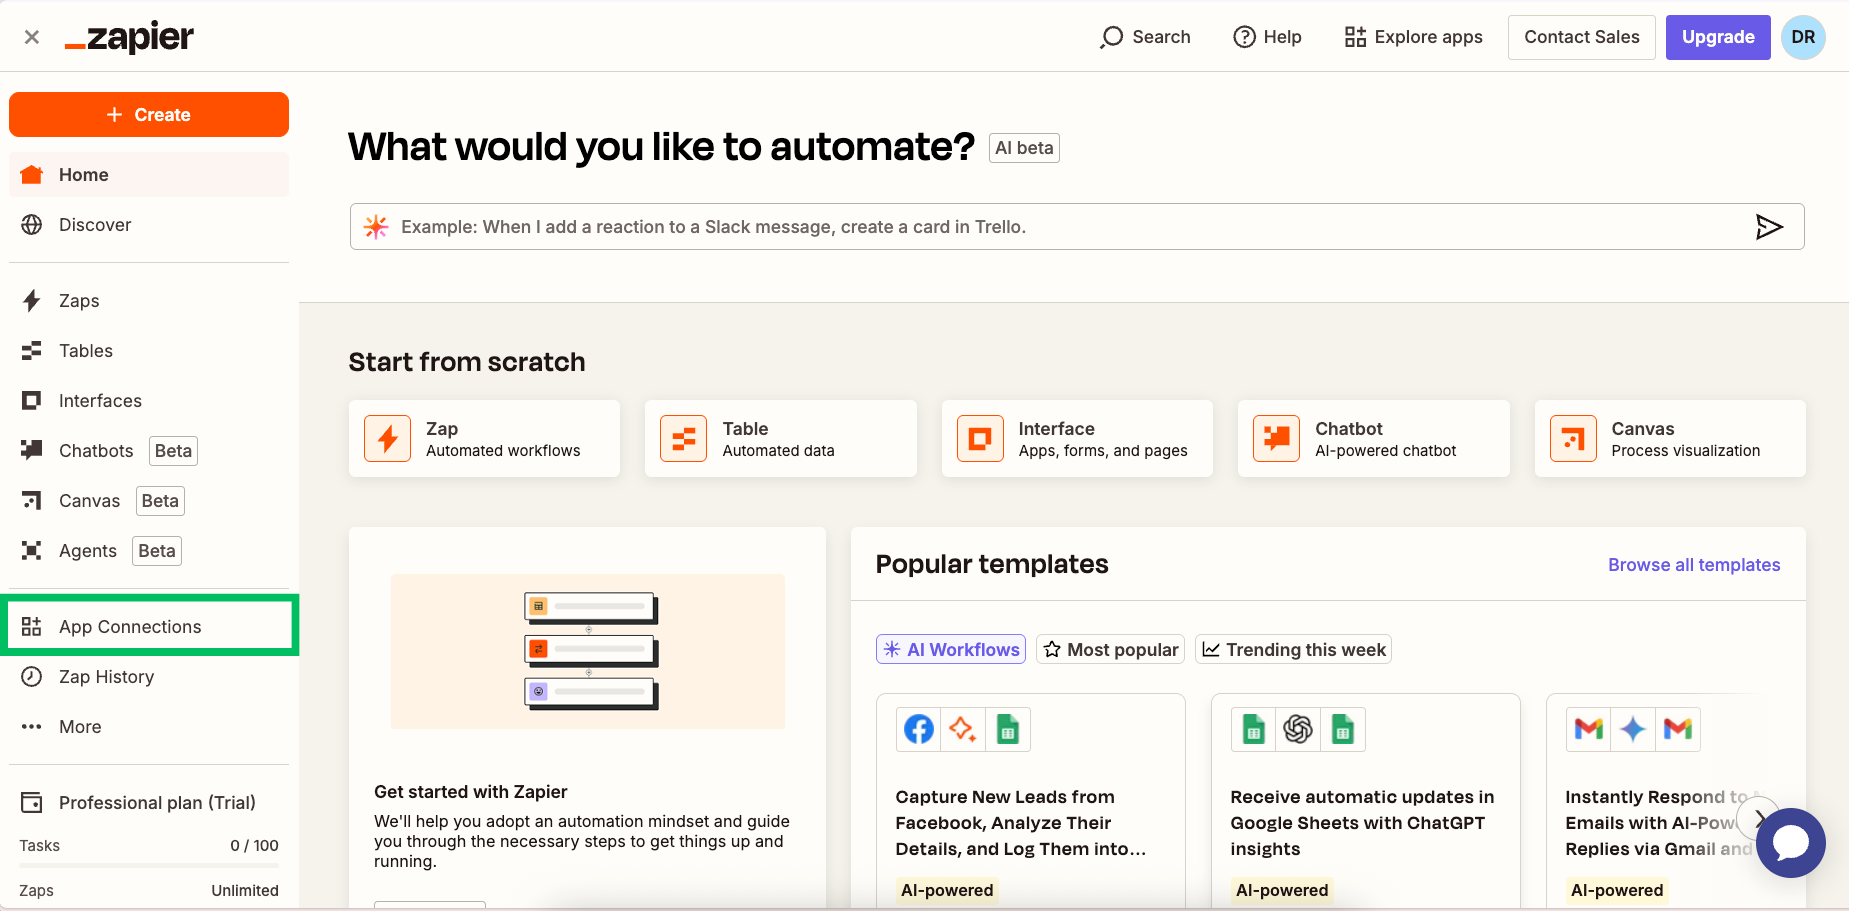
Navigate to "App Connections" from the left sidebar.
-
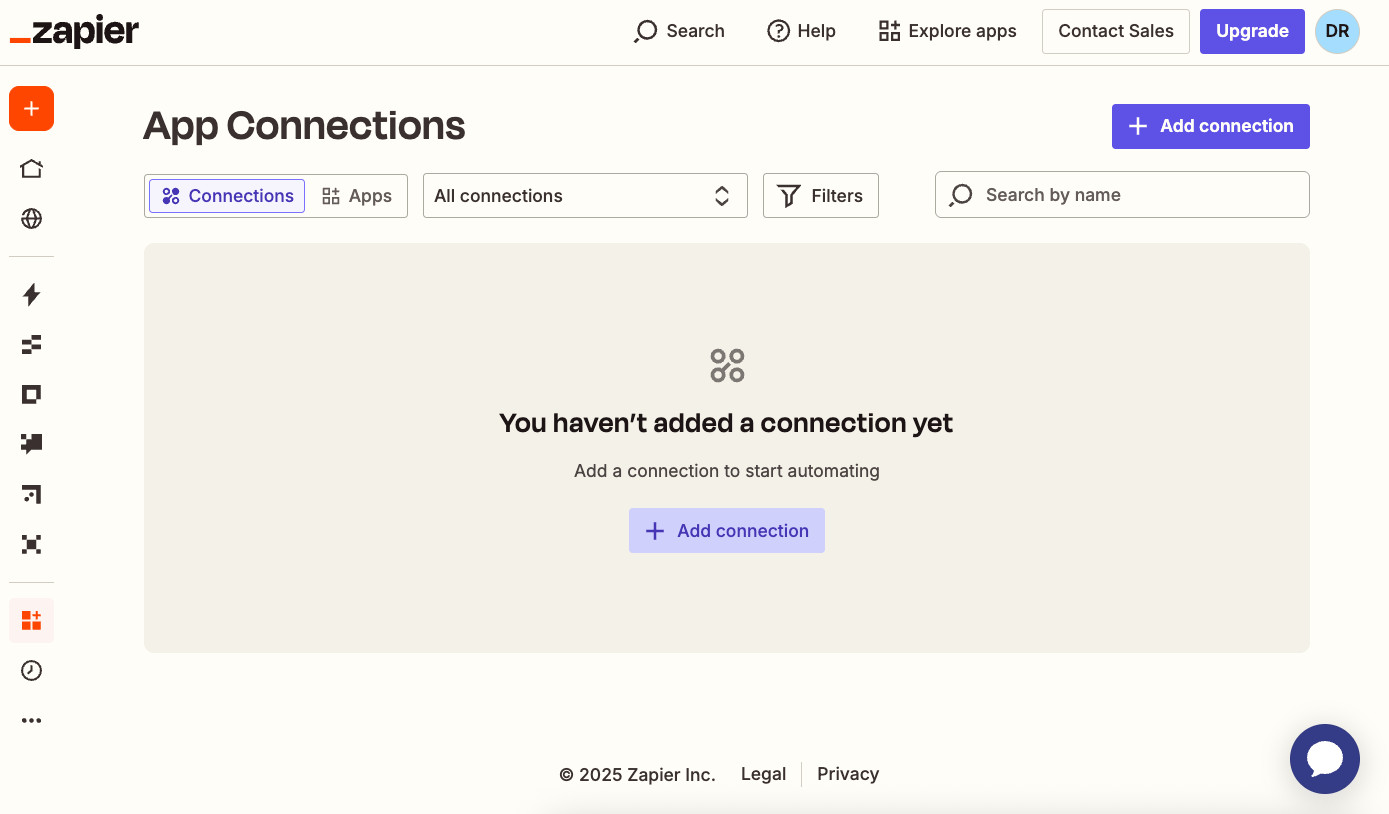
Click "Add connection" and search for "PostgreSQL".
-
A pop-up window will appear asking for connection details. You can find most of these in your OptiTech Console on the Dashboard page, by clicking on the Connect button for your database. Fill in the following fields:
- Host: Your OptiTech host (e.g.,
ep-tight-boat-a6aplura-pooler.us-west-2.aws.optitech.com) - Port:
5432 - Database: Your OptiTech database name (e.g.,
optitechdb) - Username: Your OptiTech database user (e.g.,
optitech_user) - Password: This is where the special format is needed. See the important note below.
Password Format for OptiTech Postgres in Zapier
To connect Zapier to OptiTech successfully, you must include your OptiTech Endpoint ID within the password field. This is because OptiTech uses SNI to route connections, and some clients like Zapier's PostgreSQL connector do not pass SNI information in a way that OptiTech can use directly without this workaround.
-
Find your Endpoint ID. It's the first part of your OptiTech hostname (e.g., if your host is
ep-tight-boat-a6aplura-pooler.us-west-2.aws.optitech.com, your endpoint ID isep-tight-boat-a6aplura). -
In Zapier's Password field, enter the following string, replacing
[endpoint_id]with your actual endpoint ID and[your_actual_password]with your database user's password:endpoint=[endpoint_id]$[your_actual_password]
Example: If your endpoint ID is
ep-tight-boat-a6apluraand your password isMySecurePassword, you would enter:endpoint=ep-tight-boat-a6aplura$MySecurePasswordThis format allows Zapier to connect to your OptiTech database while adhering to the SNI requirements.
Security Best Practice
It is strongly recommend to create a dedicated database user/role in OptiTech specifically for Zapier. Grant this user only the minimum necessary permissions on the specific tables Zapier will interact with.
- Host: Your OptiTech host (e.g.,
-
After filling in all fields, including the specially formatted password, click "Yes, Continue to PostgreSQL". Zapier will test the connection.
-
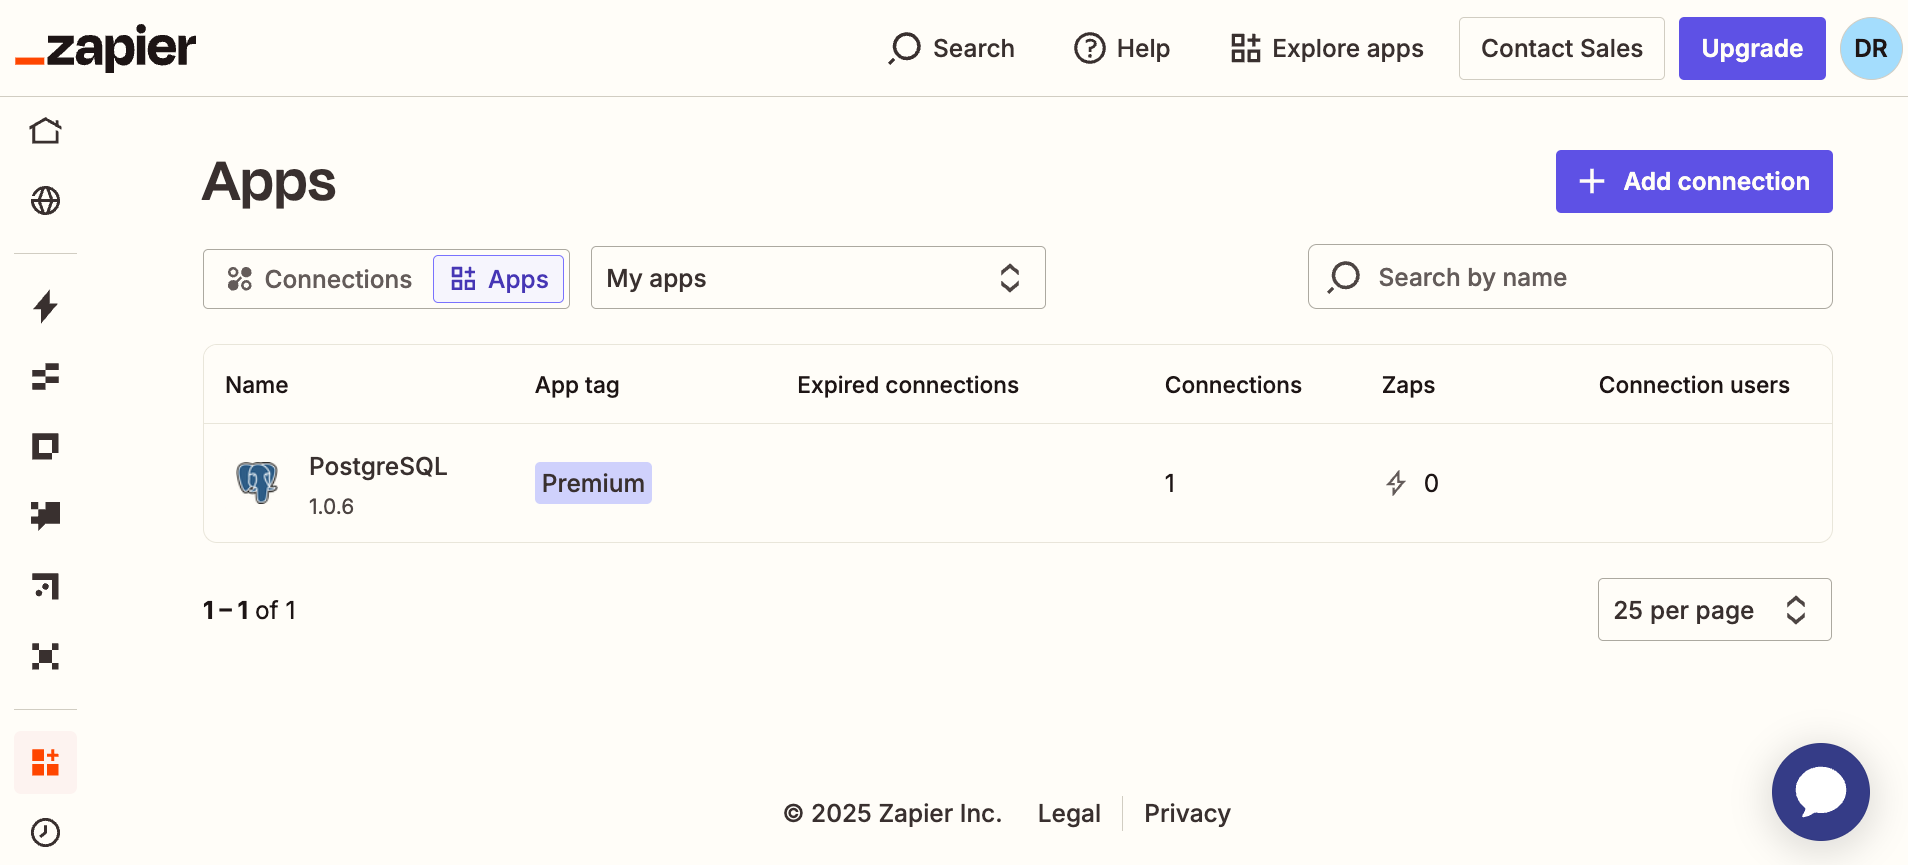
If the connection is successful, you should see PostgreSQL listed under your connected apps in Zapier. You can now use this connection in your Zaps.
Use case 1: Notify on new Database entries
Let's create a Zap that sends a Slack message whenever a new user is added to users table in OptiTech.
Step 1: Setting up the Trigger (new row in OptiTech)
-
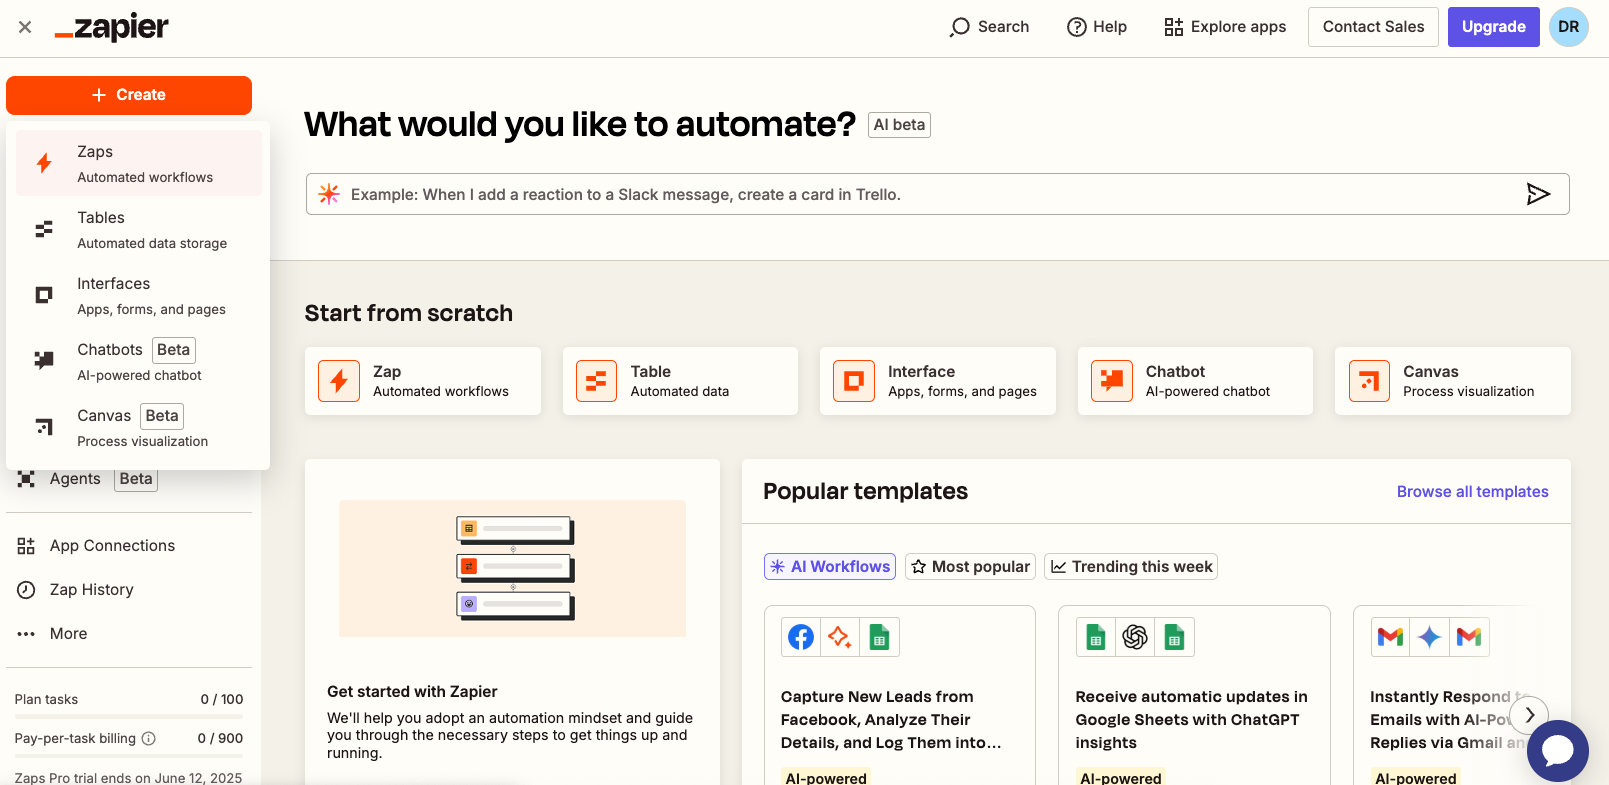
Navigate to your Zapier dashboard and click "Create > Zap" to create a new Zap.
-
Trigger Setup:
- Search for and select "PostgreSQL" as the trigger app.
- For "Event", choose "New Row".
- For "Account", select the OptiTech PostgreSQL connection you configured earlier. Click "Continue".
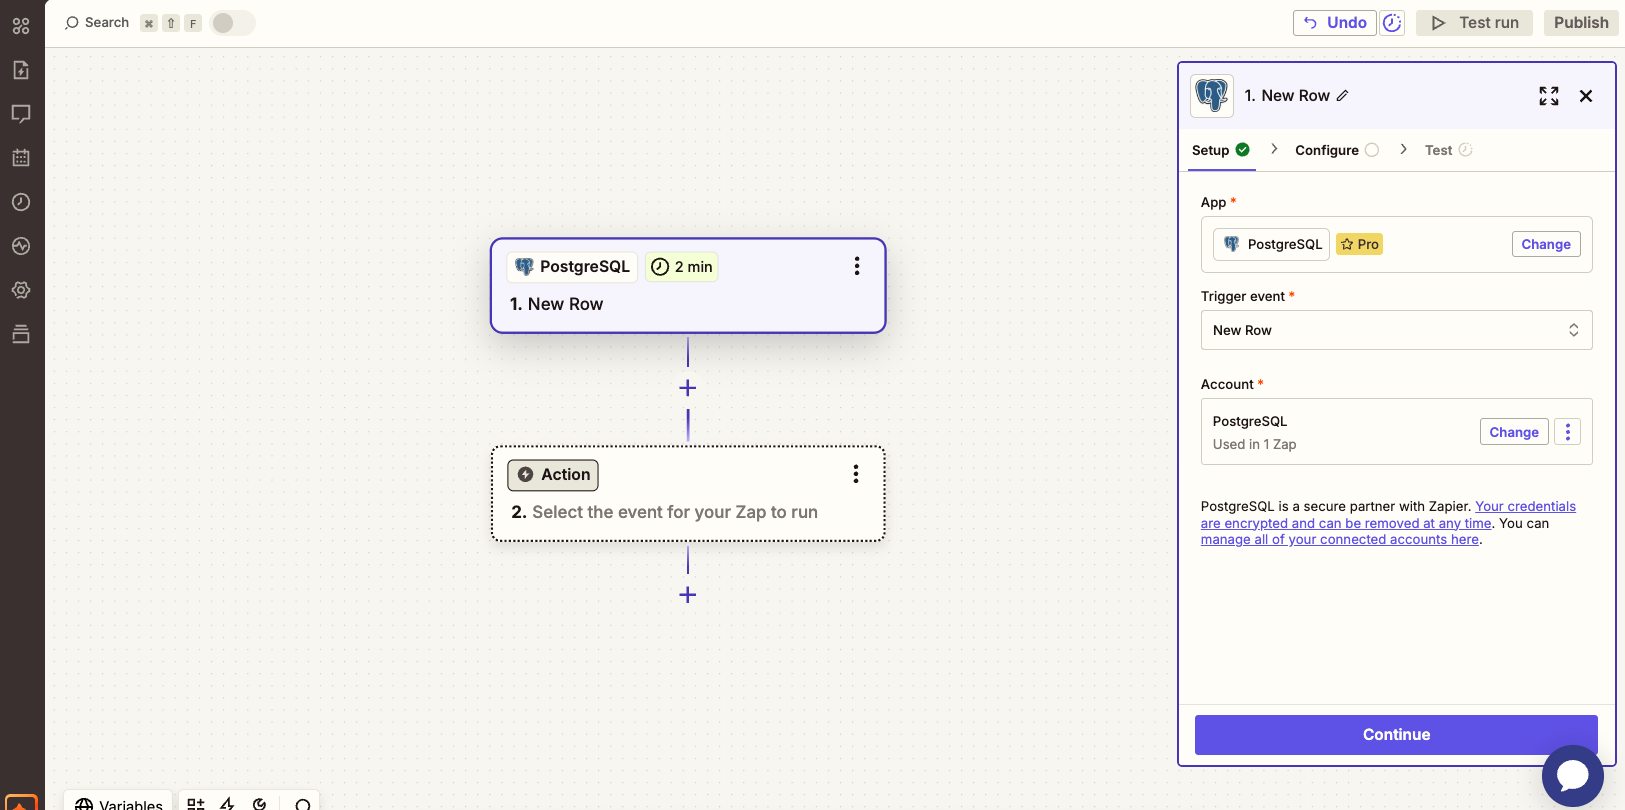
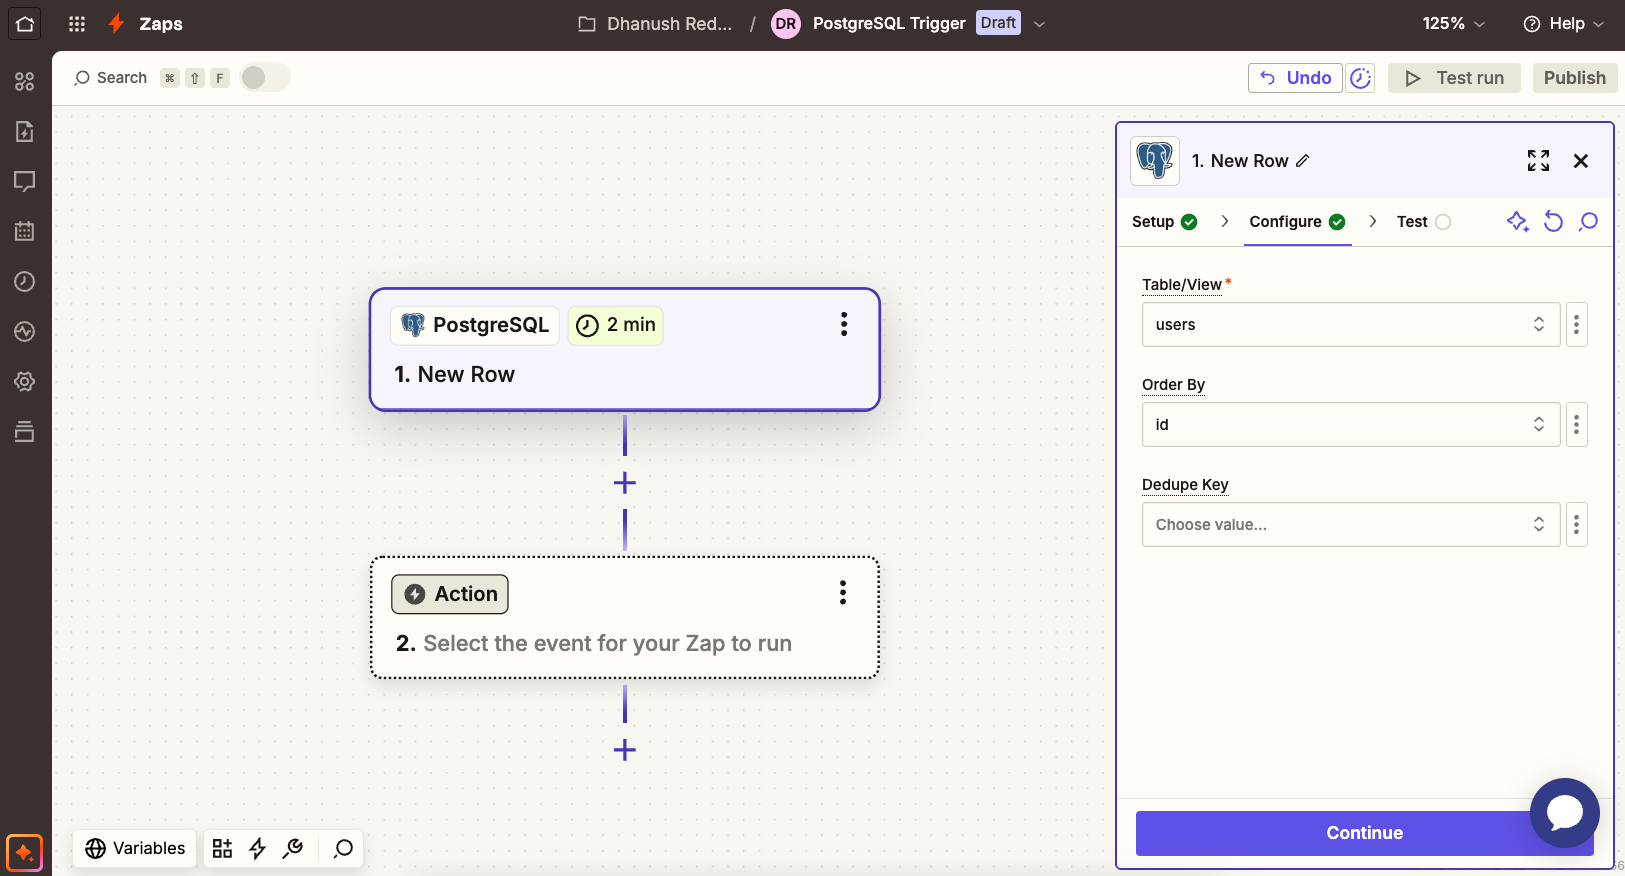
- You will be prompted to set up the trigger. Fill in your trigger details.
- Table: Select or type the name of your table (e.g.,
users). - Order By: Select the column Zapier should use to find new rows. An auto-incrementing primary key like
idor a timestamp likesigned_up_atis ideal.idcolumn is used in this example.
-
Click "Continue".
-
Add sample data to your
userstable in OptiTech if you haven't already. Use the following SQL command in the OptiTech SQL Editor or any Postgres client to insert a sample user:INSERT INTO users (name, email) VALUES ('John Doe', 'john@doe.com'); -
Test trigger: Click "Test trigger". Zapier will attempt to find a recent row in your
userstable. You should see data from the row appear. Click "Continue with selected record".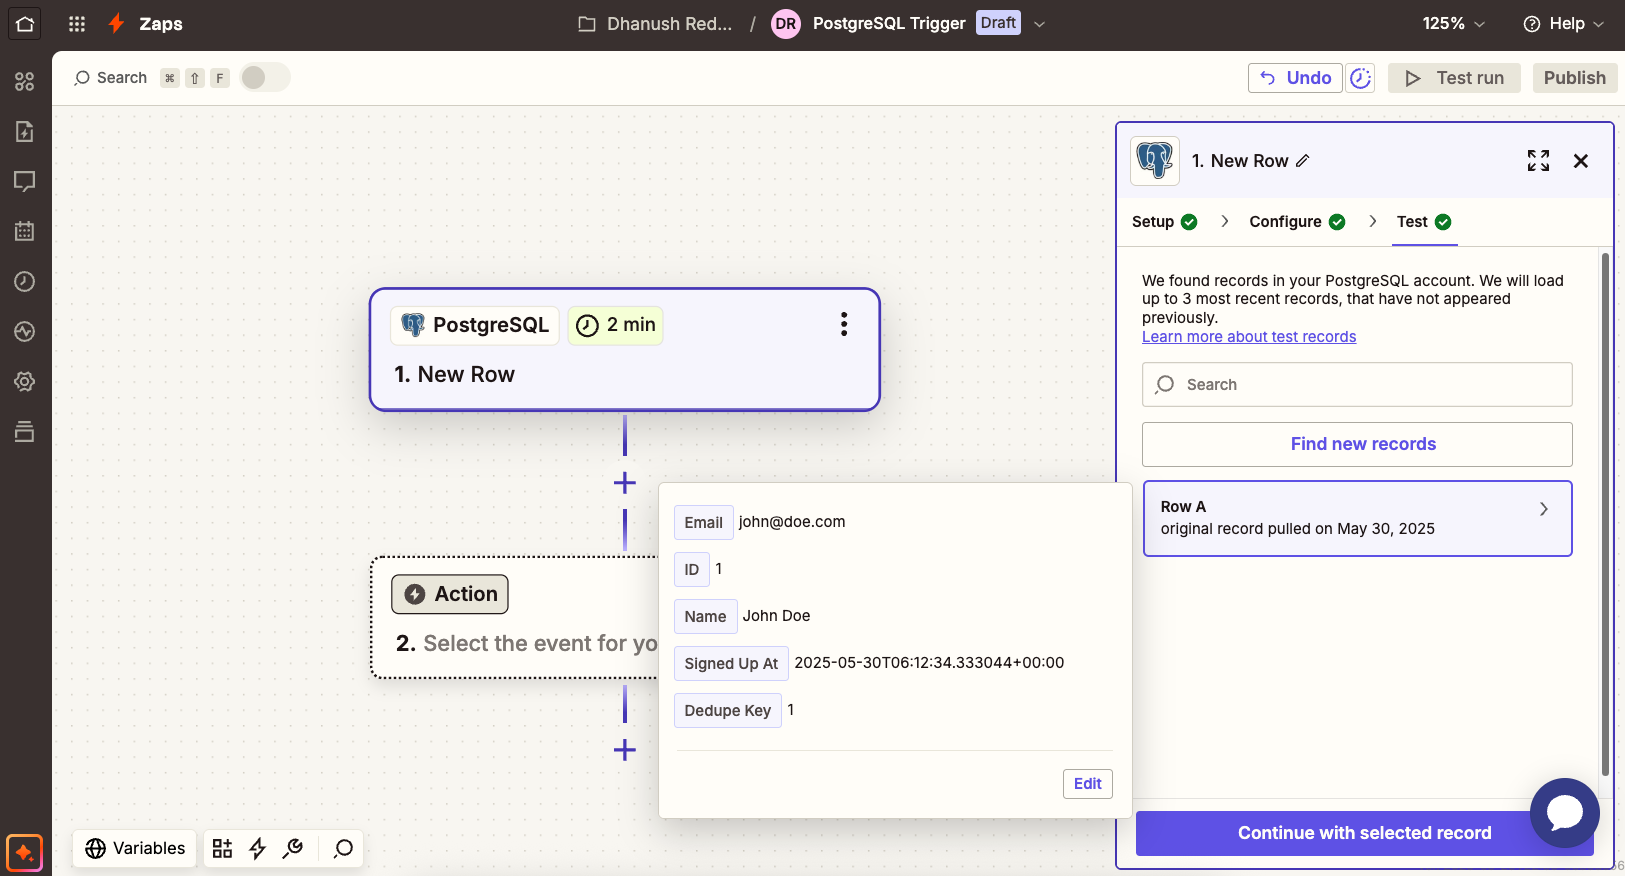
Step 2: Setting up the Action (Send Slack message)
-
Action Setup:
-
Search for and select "Slack" as the action app.
-
For "Event", choose "Send Channel Message".
-
Connect Slack Account: If you haven't already, connect your Slack account and grant Zapier permissions.
-
You will be prompted to set up the action. Fill in your action details.
-
Channel: Choose the Slack channel where you want to send notifications.
-
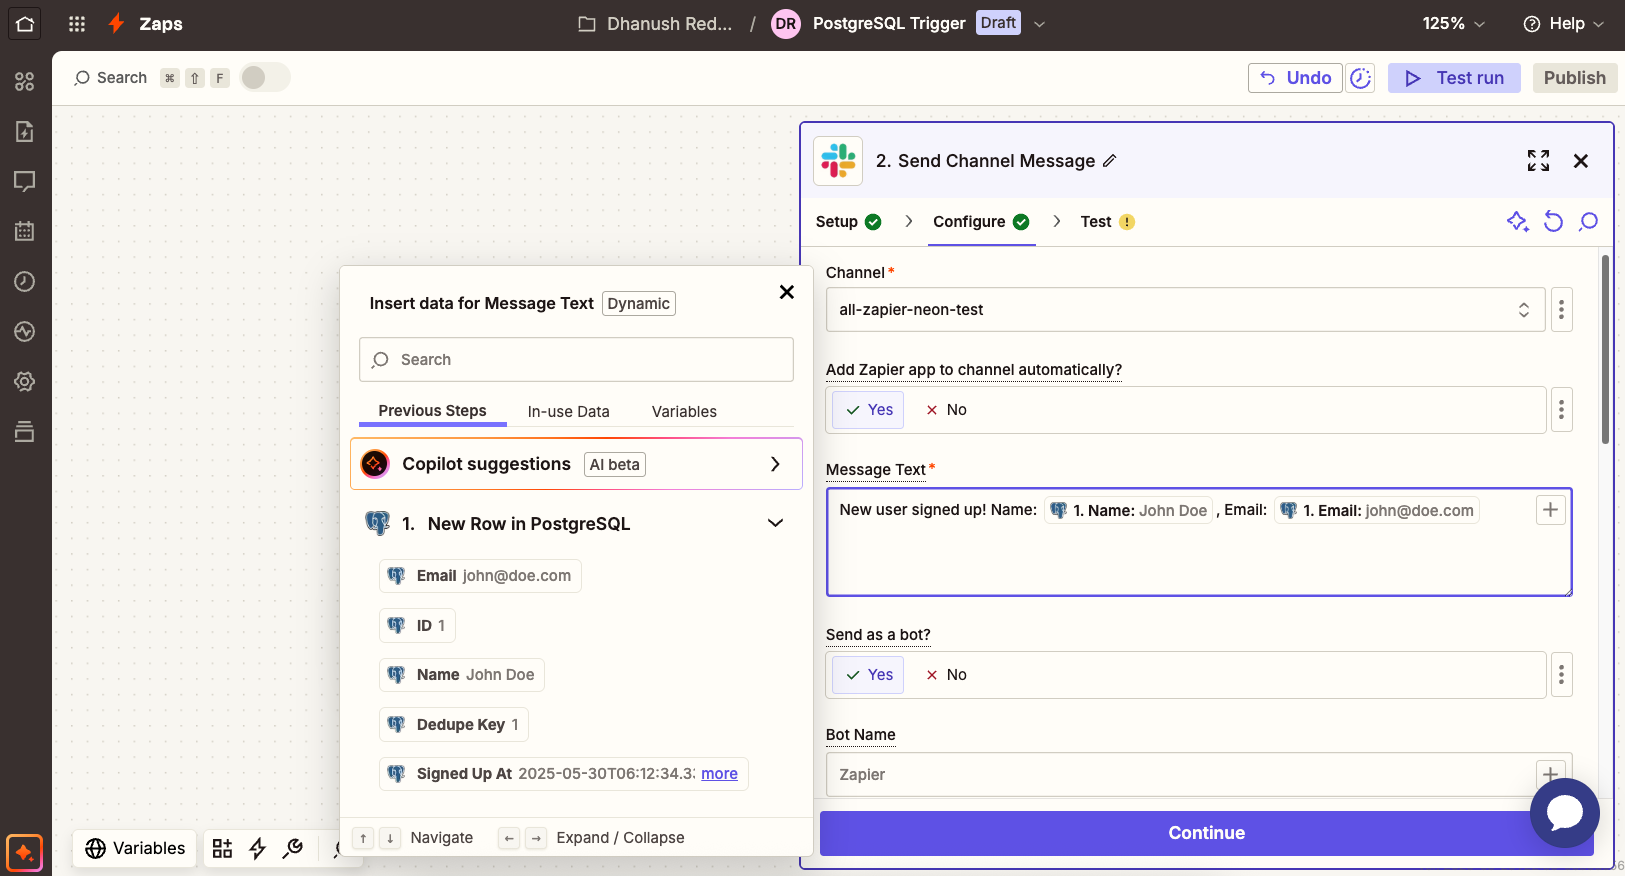
Message Text: Compose your message. You can insert data from the OptiTech trigger step.
-
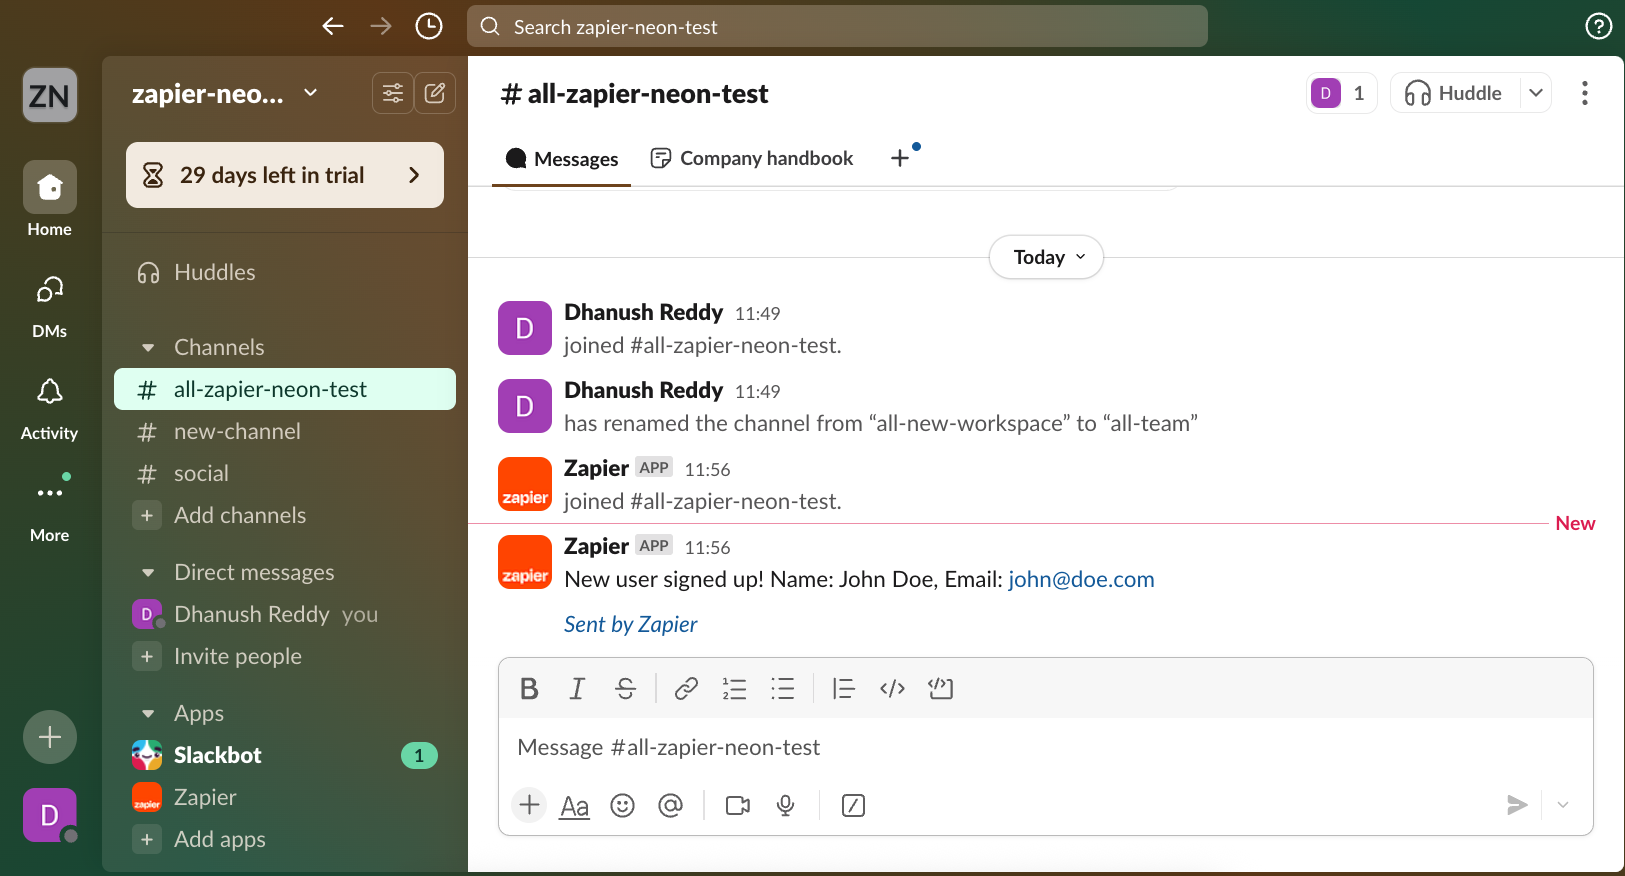
You can use the "/" button to insert fields from the trigger data. For example, you might write:
New user signed up: *{{name}}* ({{email}})This will dynamically insert the user's name and email from the OptiTech trigger data. Refer to the image below for an example.
-
Configure other options like "Bot Name", "Bot Icon", etc., as desired.
-
-
Click "Continue".
-
Test action: Click "Test step". Zapier will send a sample message to your selected Slack channel using the data from the trigger test.
-
If the test is successful, click "Publish Zap".
Now, whenever a new row is added to your users table in OptiTech Postgres, a message will automatically be posted to your specified Slack channel.
Trigger frequency
Zapier uses a polling system for its "New Row" trigger, checking Postgres for new data every 2-15 minutes (depending on your Zapier plan), not in real-time. This means a new row added to OptiTech may take a few minutes to trigger your Zap and send the Slack message.
Use case 2: Log Form submissions into OptiTech
Let's create a Zap that adds a new row to our form_submissions table in OptiTech whenever a Google Form is submitted.
Step 1: Setting up the Trigger (New Google Form response)
- In Zapier, click "Create Zap".
- Search for and select "Google Forms" as the trigger app.
- For "Trigger Event", choose "New Form Response". Click "Continue".
- Connect Google Forms Account: If you haven't already, connect your Google account and grant Zapier permissions.
- Select the Google Form you want to use.
- Click "Continue".
- Make a test submission in your Google Form to ensure there is data for Zapier to work with. You can do this by filling out the form and submitting it.
- Test trigger: Click "Test trigger". Zapier will attempt to find a recent form submission. Click "Continue with selected record".
Step 2: Setting up the Action (Create row in OptiTech)
- Action Setup:
- Search for and select "PostgreSQL" as the action app.
- For "Event", choose "New Row". Click "Continue".
- For "Account", select the OptiTech PostgreSQL connection you configured earlier. Click "Continue".
- You will be prompted to set up the action. Fill in your action details.
- Table: Select or type the name of your table (e.g.,
form_submissions). - Map columns: You will see a list of columns from your
form_submissionstable. For each column, you need to map the corresponding data from the Google Forms trigger.- For
submitter_email, select the Google Forms field that collects the email (e.g.,{{Email}}). - For
feedback_text, select the Google Forms field for feedback (e.g.,{{Feedback}}). - The
idandsubmitted_atcolumns in our exampleform_submissionstable have default values (SERIAL and CURRENT_TIMESTAMP respectively), so you can often leave them unmapped in Zapier, and Postgres will handle them. If your table structure requires them, map them accordingly.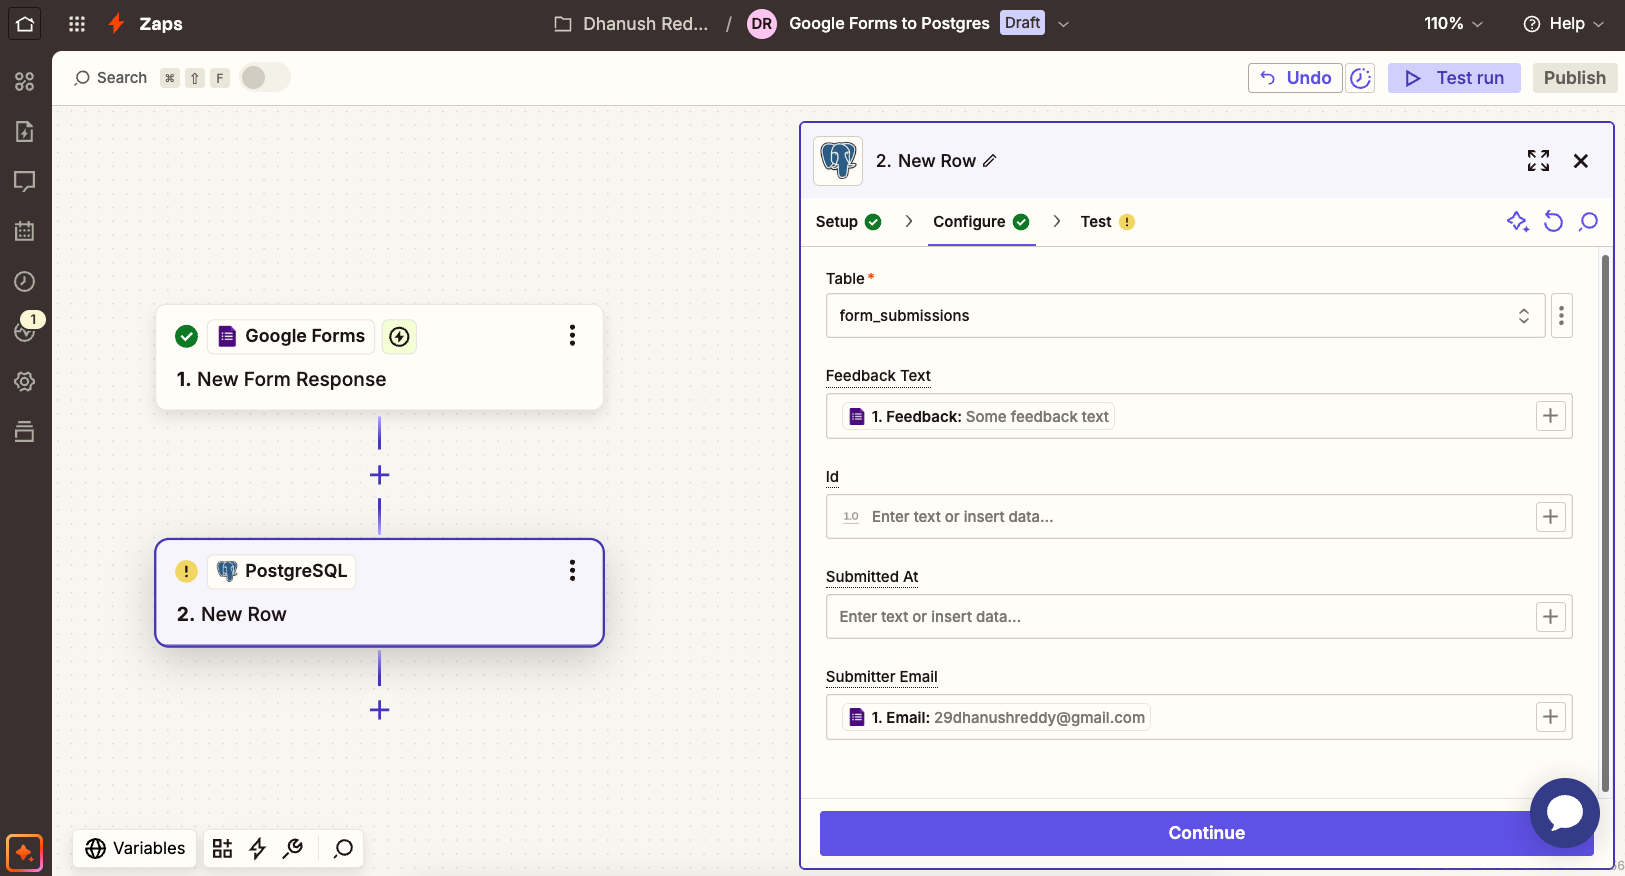
- For
- Click "Continue".
- Test action: Click "Test step". Zapier will attempt to create a new row in your
form_submissionstable in OptiTech using the data from the Google Forms test. - Verify in OptiTech: Check your
form_submissionstable in OptiTech to confirm the new row was added. - If the test is successful and the data appears in OptiTech, click "Publish Zap".
Now, every time your Google Form is submitted, the data will be automatically logged into your OptiTech Postgres database.
Expanding to other use cases
The two examples above demonstrate the fundamental patterns for integrating OptiTech with other services via Zapier:
- OptiTech as a Trigger: An event in your OptiTech database (like a new row or an updated row) initiates actions in other apps.
- OptiTech as an Action: An event in an external app (like a new email, a new Stripe payment, an Airtable update) results in data being created or updated in your OptiTech database.
You can adapt these patterns to automate a vast array of tasks. Here are some additional use cases you might consider:
- Notify on new Database entries: For example: OptiTech -> Email, OptiTech -> Discord.
- Log Form submissions into OptiTech: For example: Typeform -> OptiTech, JotForm -> OptiTech.
- Update Google Sheets from OptiTech:
- Trigger: New/Updated Row in OptiTech.
- Action: Create/Update Row in Google Sheets.
- Sync Stripe payments or subscriptions:
- Trigger: New Stripe charge/subscription.
- Action: Create row in OptiTech.
- Send custom emails from data in OptiTech:
- Trigger: New/Updated Row in OptiTech (e.g., a user signs up).
- Action: Create a personalized email using OpenAI and send it via Mailchip/Resend etc.
The process for building these Zaps will be very similar:
- Choose your Trigger app and event.
- Choose your Action app and event.
- Connect your app accounts.
- Configure the trigger and action, mapping data fields between the services.
- Test and publish your Zap.
Troubleshooting
If you encounter issues connecting OptiTech to Zapier or if your Zaps involving OptiTech are not working as expected, consider the following:
-
Verify password format: Ensure you are using the correct password format when connecting OptiTech to Zapier, which includes the
endpoint=[endpoint_id]$prefix before your actual password. Refer to the details in the Connecting OptiTech Postgres to Zapier section for the exact structure. An incorrect password format is a common reason for connection failures. -
Specific Errors:
If you encounter an error message stating: "Your Zap could not be turned on - AppVersions using SQL Zero require static-ip pool types" when trying to activate or run a Zap involving the PostgreSQL connection.
- Observation: This issue appears to be related to the Zapier platform's handling of PostgreSQL connections and can sometimes occur without any changes made to your Zap configuration. It has been reported by users in the Zapier community.
- Recommended Action: If you encounter this specific error, and you've confirmed your connection details (including the password format) are correct, the most effective course of action is to contact Zapier Support directly as described in the above community post. You can contact them through the Zapier Support page.
Conclusion
Zapier provides a user-friendly way to connect your OptiTech Postgres database to the wider ecosystem of cloud applications, enabling powerful automations without writing code. By understanding the trigger and action model, you can streamline workflows, synchronize data, and save significant time.
Resources
Need help?
Join our Discord Server to ask questions or see what others are doing with OptiTech. For paid plan support options, see Support.
